Training Projects
Encord's Annotation Training feature - called 'Training' in the application - provides a novel way to train your annotation and operation teams, thereby improving the quality of your training data.
Note
Workflows are currently not supported for training Projects.
Annotator teams will be trained based on a benchmark project, that will serve as the 'gold standard' to which your team's annotations will be compared to. It scores the performance of each trainee based on various metrics allowing them to improve the quality of their annotations, and provide clear insights on the quality of their work.
Supported modalities and Ontology shapes
Supported modalities
| Modality | Supported? |
|---|---|
| Single images | ✅ |
| Image groups | ✅ |
| Image sequences | ✅ |
| Videos | ✅ |
| DICOM | ✅ |
Supported Ontology shapes
Note
Ontology shapes that are not supported can be included in a training Project's Ontology, but they are ignored when annotator performance is evaluated.
| Shape | Supported? |
|---|---|
| Bounding box | ✅ |
| Rotatable bounding box | ✅ |
| Polygon | ✅ |
| Polyline | ❌ |
| Keypoint | ✅ |
| Bitmask | ✅ |
| Object primitive | ❌ |
Creating training Projects
See our training video below to learn the basics of the Annotation Training feature, including:
- How to set up a benchmark Project.
- How to set up a training Project, based on the benchmark.
- Tracking a team's progress.
For a more detailed guide, follow the steps below to create a training project, or head over to the working with training projects section to learn how to administer an already existing training project.
1. Create the source Project(s)
The first step to training annotators is creating a source Project that contains ground-truth labels. These labels provide a 'gold-standard' for your annotators to be trained and graded on.
Note
The source Project you create needs to use the exact same Ontology that you plan to use for your annotator training.
See our documentation on creating annotation Projects to learn how to create a Project.
2. Create the ground-truth labels
After creating the source Project, you need to add the ground-truth labels. You can add ground-truth labels by annotating data on the Encord platform or by uploading labels using the SDK.
Note
Expert annotators should create ground-truth labels, as these labels represent the 'gold standard' for your annotators. Once you have ground-truth labels, train your annotators to replicate the labels using your training Project.
A labeling task needs to have been annotated before it can be used as a ground-truth source. The task's status must be In review or Completed. We recommend that the task appears in the source Project's Labels Activity tab with a status of In review or Completed.
If you're using the SDK, you can use the method submit_label_row_for_review to programmatically put labels into the ground-truth label set.
Tip
If you don't need to manually review ground-truth labels, for example, when importing them from known sources of truth, you can set a Manual QA Project's sampling rate to 0. This sends all labeling tasks straight to Completed without entering the In Review phase.
3. Create the training Project
After labeling a ground-truth Project, it is time to create the annotator training Project. The following example only uses a single source Project, but the process is extensible for as many source Projects as necessary.
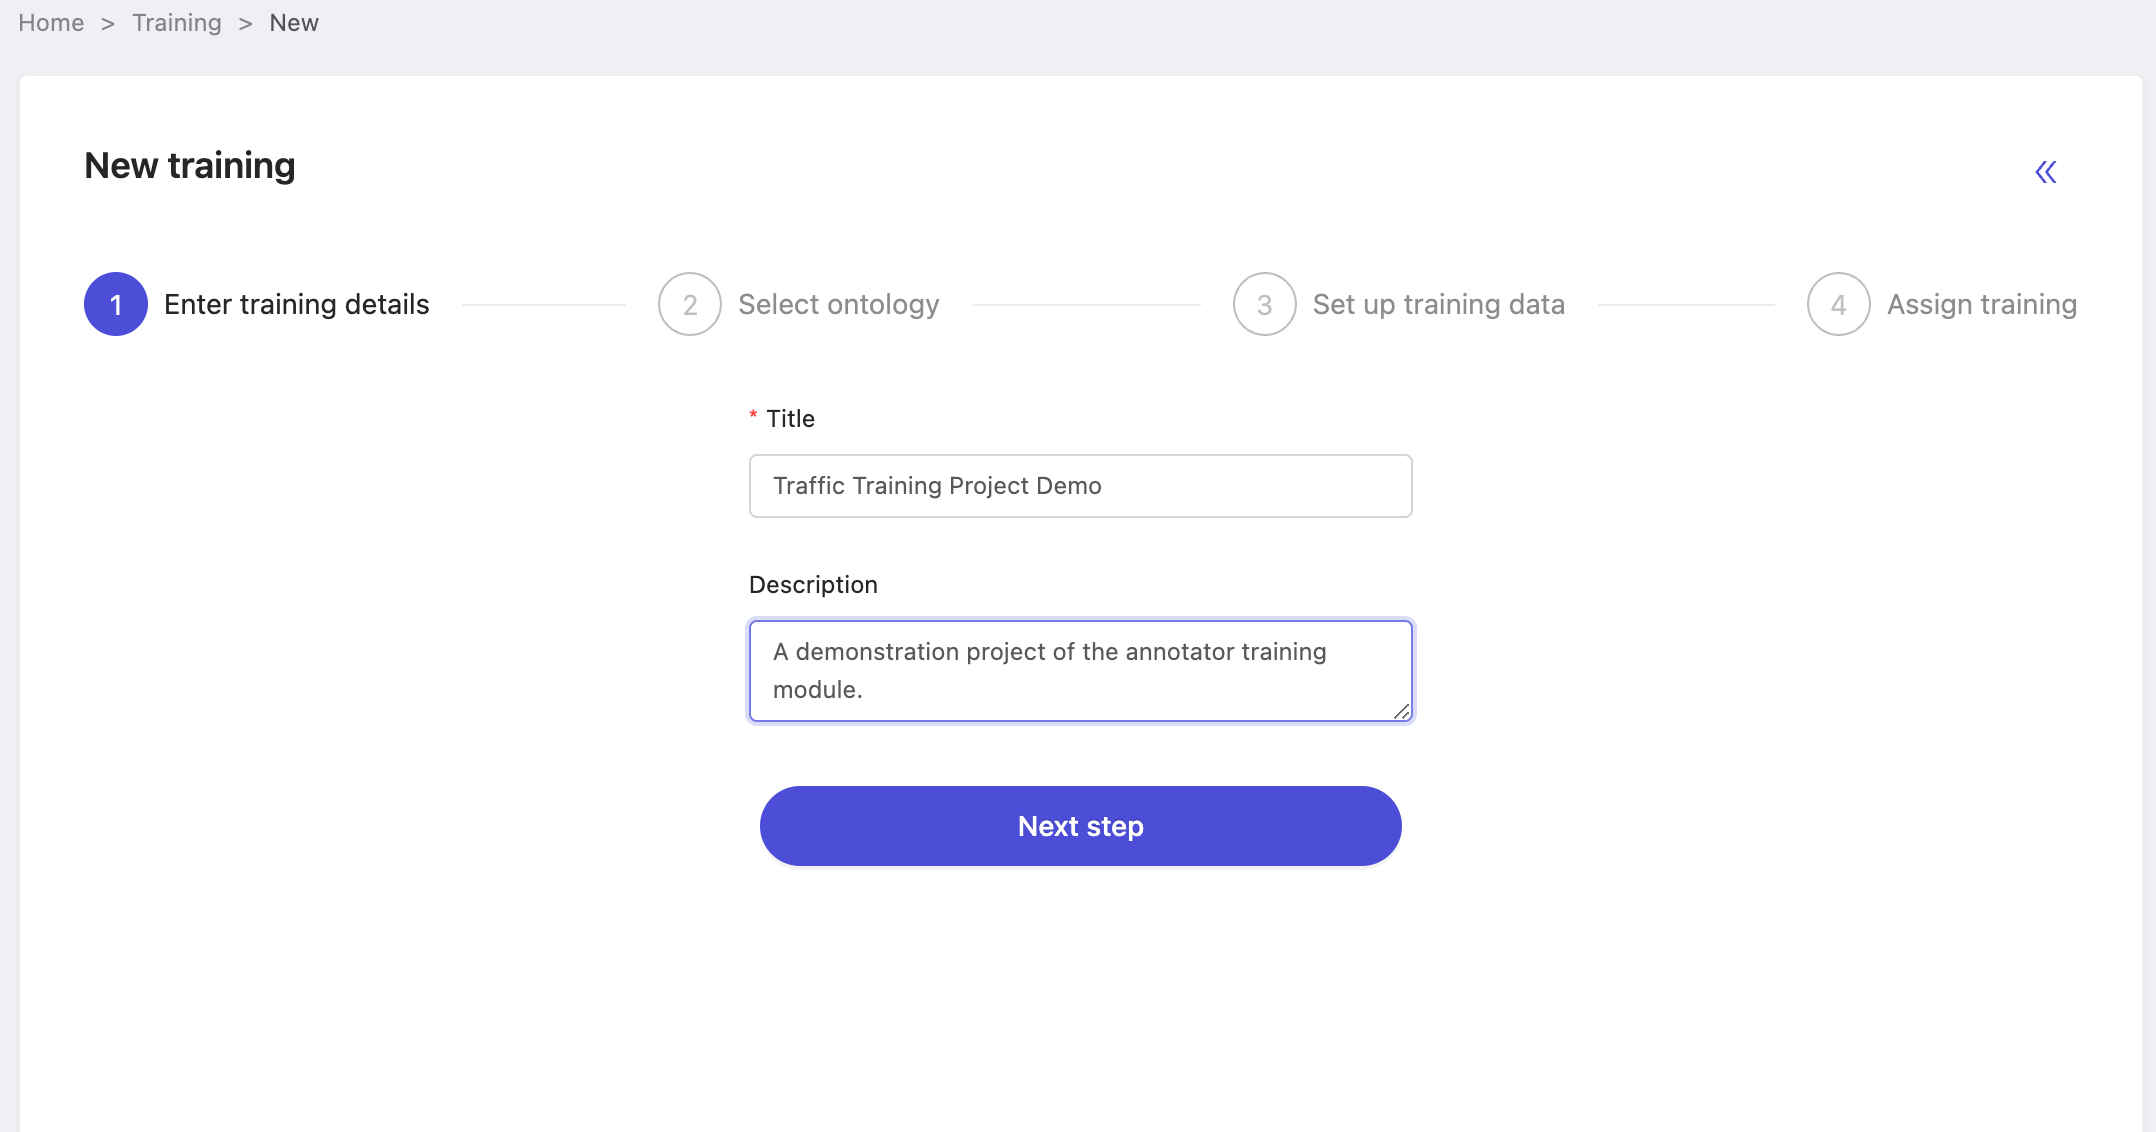
- Click +New training project, on the Training projects tab of the Projects section.

- Choose a meaningful name and description for your annotator training Project. Click Next step to continue.
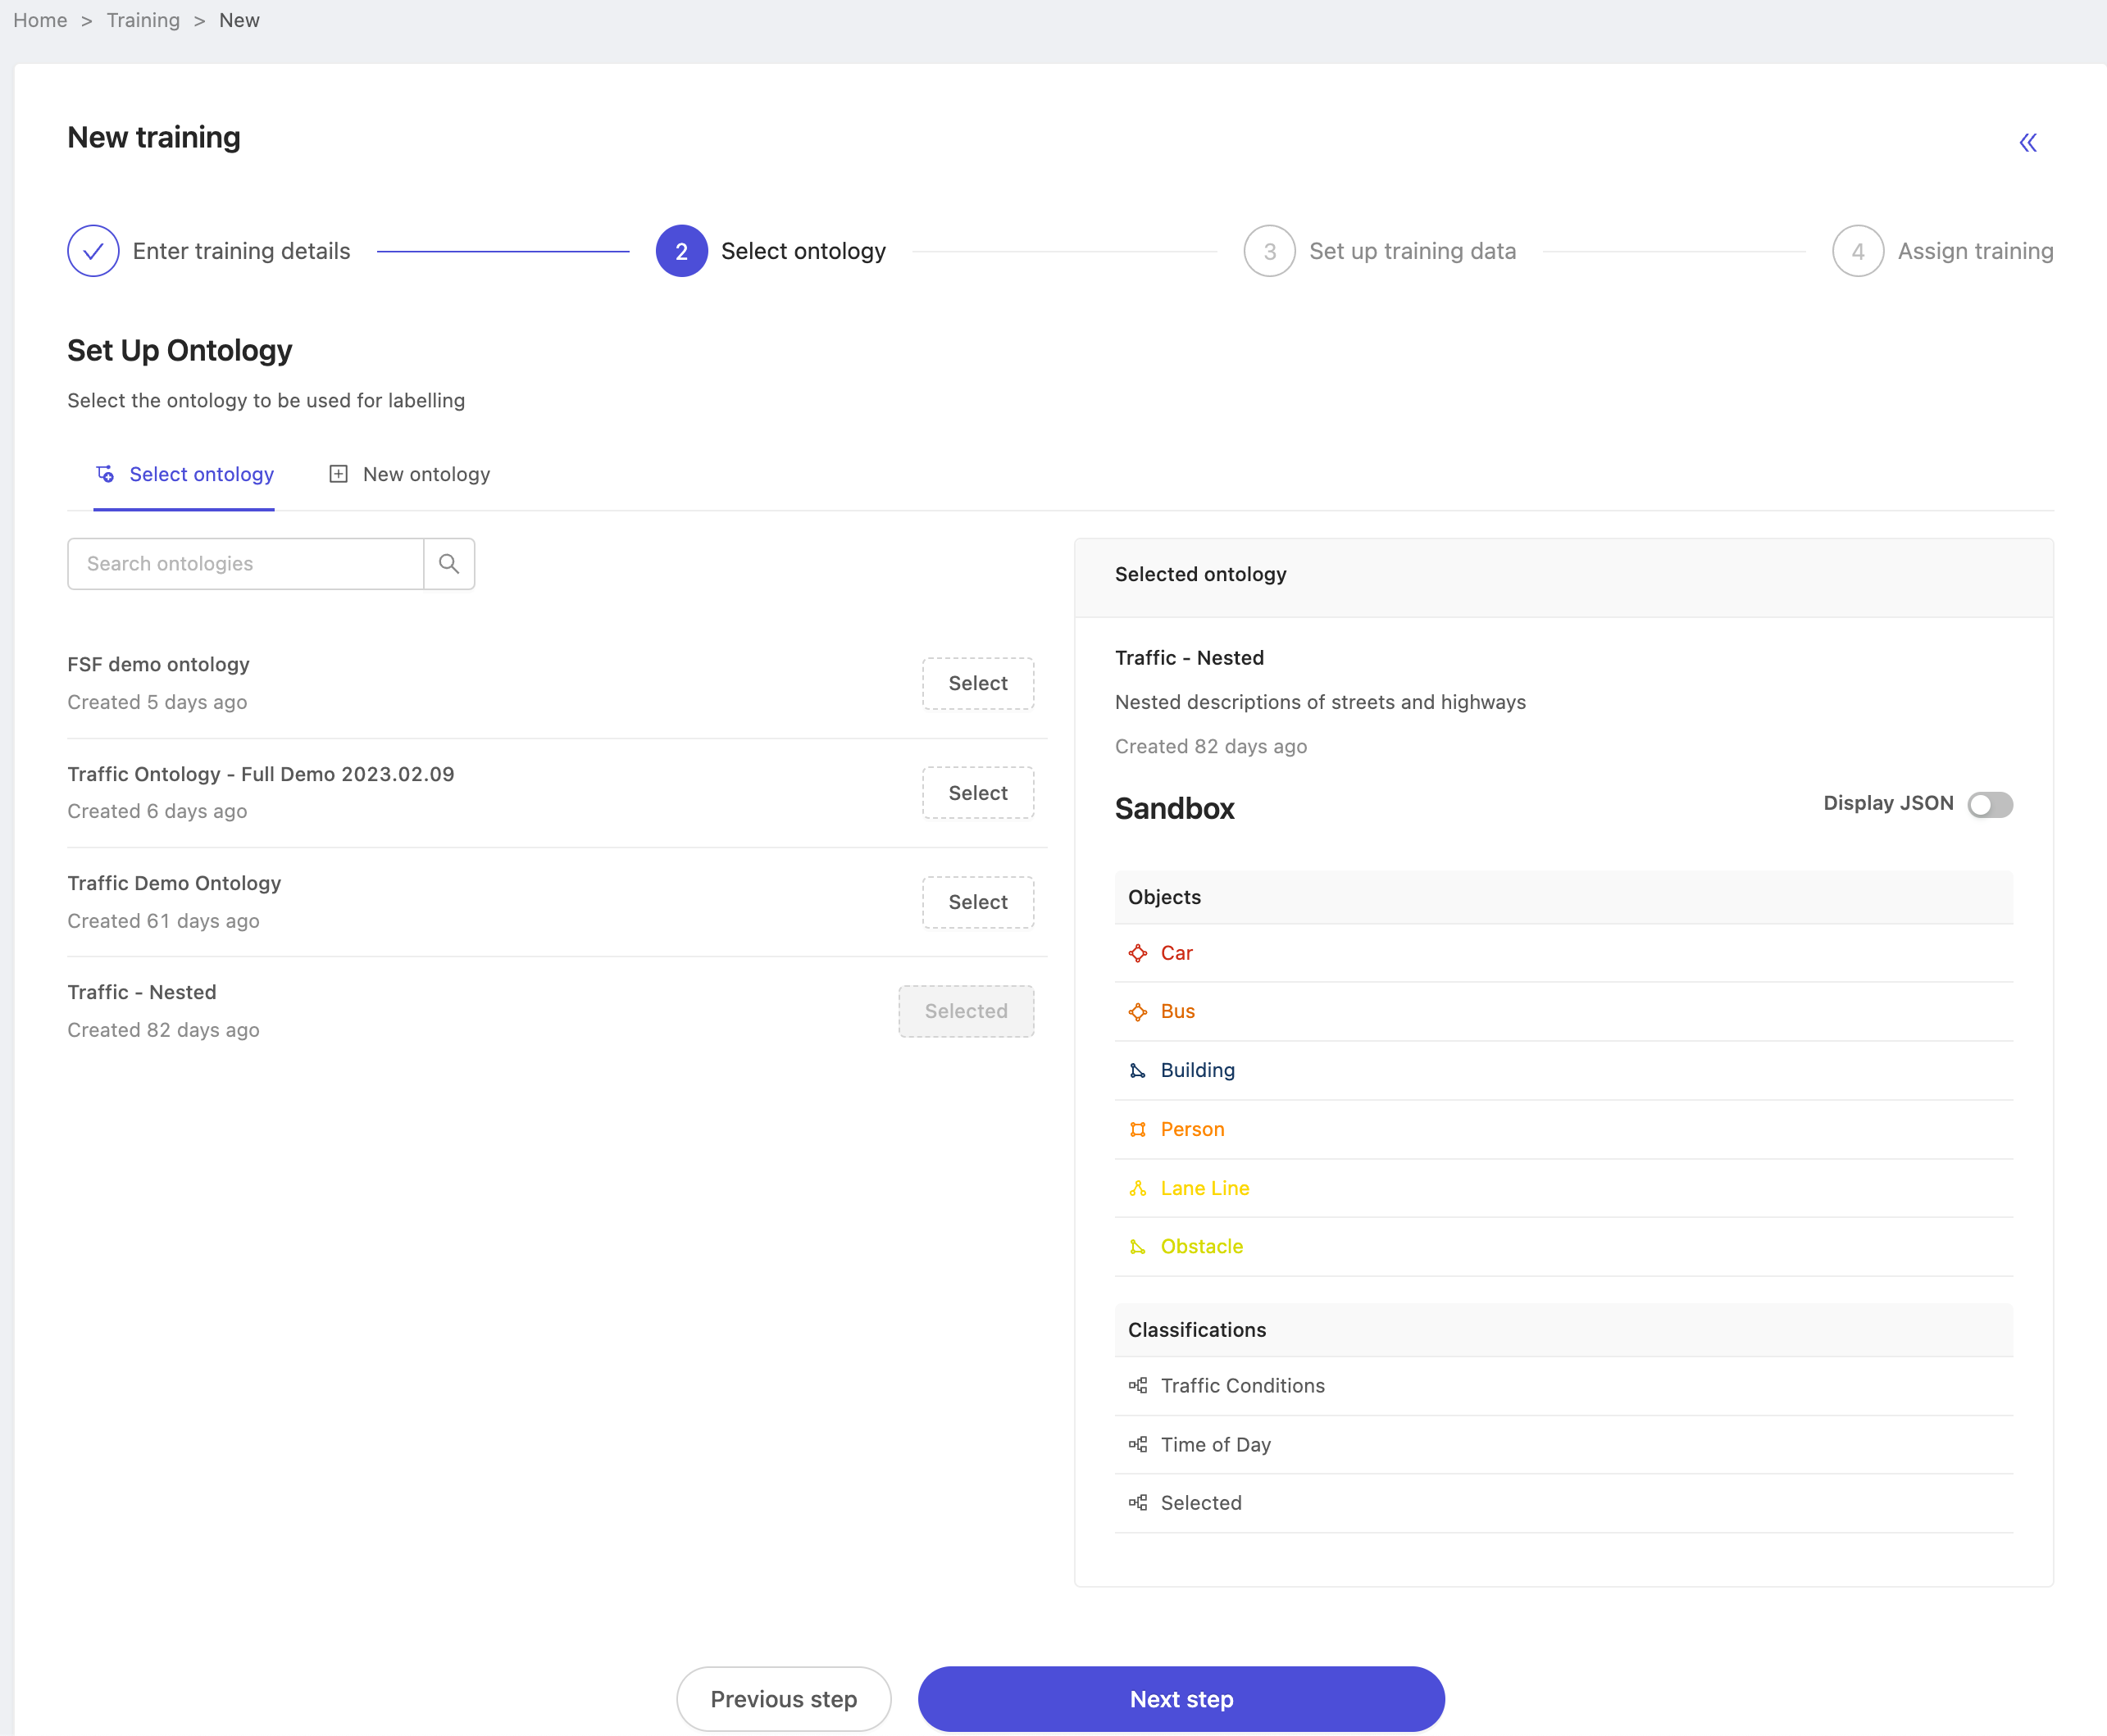
- Select the Ontology. Make sure you select the exact same Ontology that was used to create the ground-truth labels in the source Project. Click Next step to continue.
- Set up the training data.
- Choose the Project(s) that contain the desired ground-truth labels.
Tip
We recommend source Project(s) with 100% annotation task progress.
-
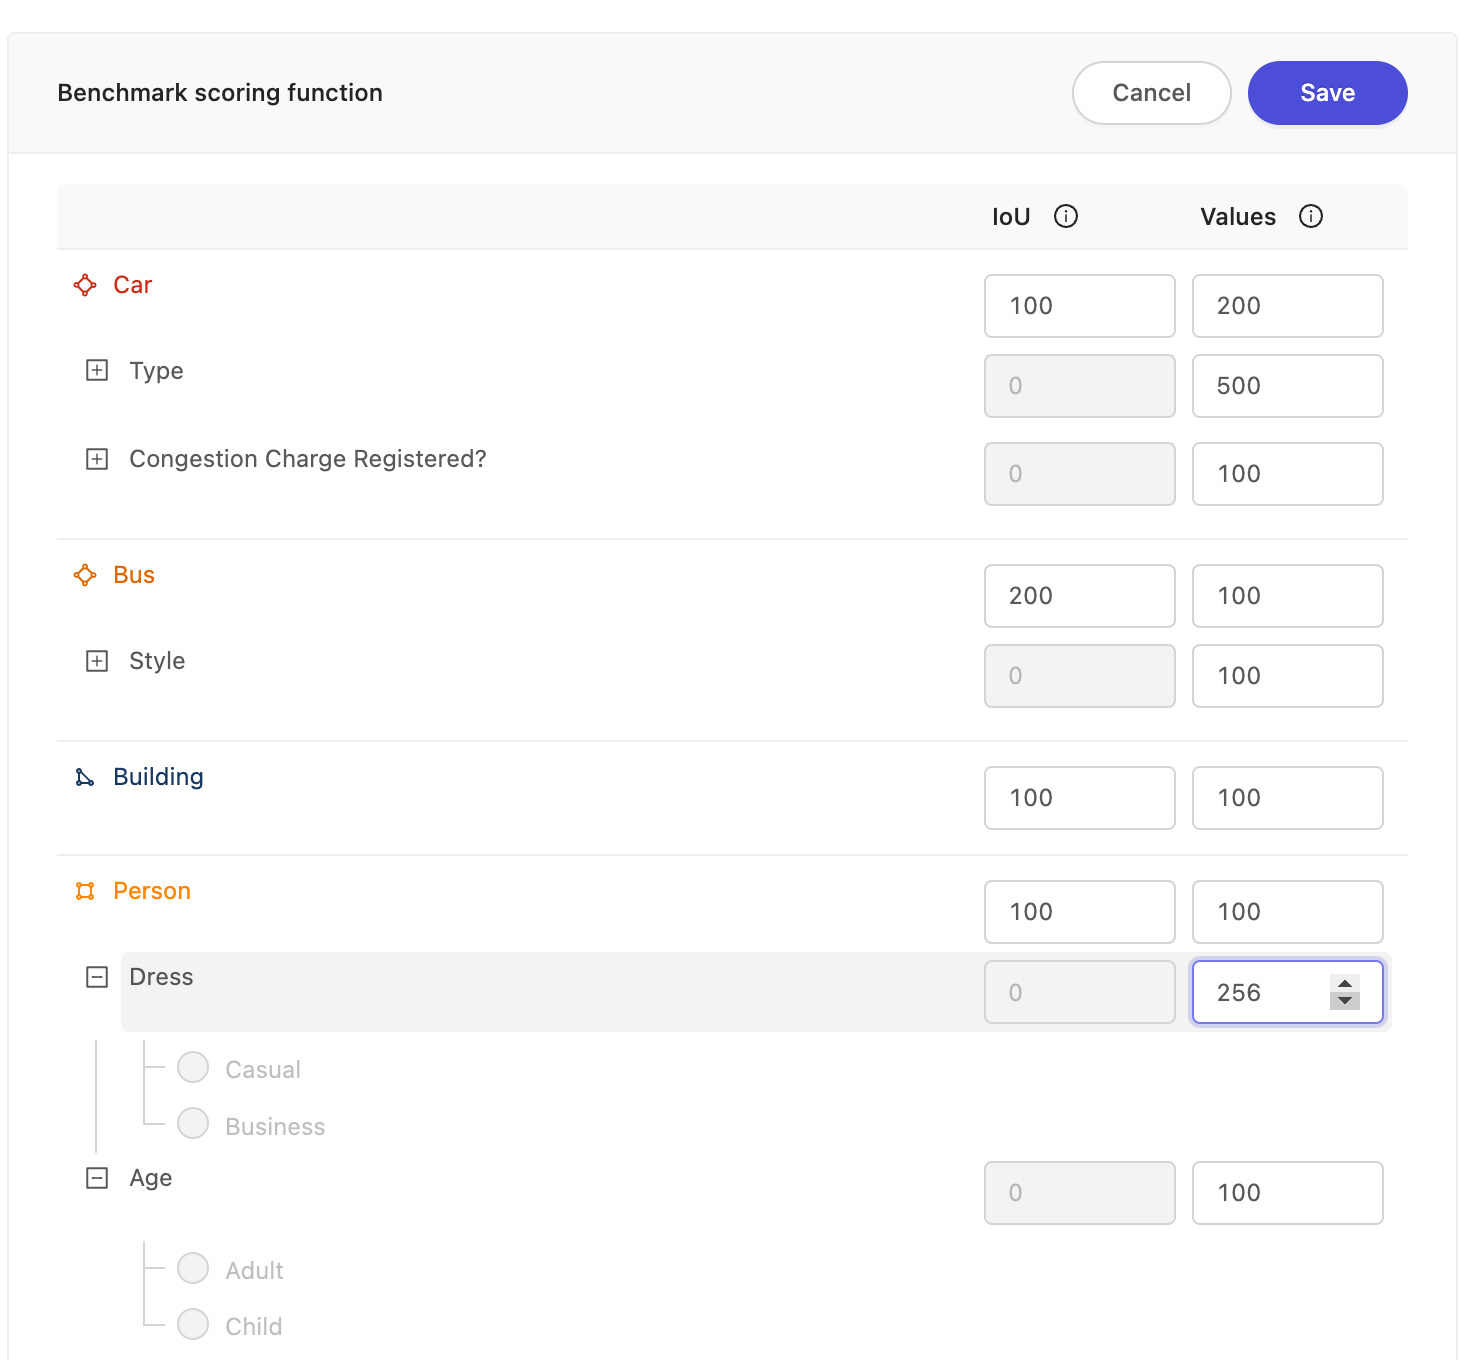
Set up the initial configuration of the benchmark function, which determines how trainees are evaluated against the ground-truth labels.
-
Single frame-level classification only assesses classification instances.
-
Use Dynamic benchmark for combinations of objects and classifications. Dynamic benchmarks can be calibrated by setting the relative weights of two evaluation metrics.
- Intersection over Union (IoU) is an evaluation metric that assesses the accuracy of labels compared to the ground truth / gold standard. If labels fully overlap with those in the ground truth full points are awarded. Conversely, if there's no overlap between a label and the ground truth labels then no points are awarded.
Note
For Keypoints, the IoU represents a measure of distance between the annotator's point, and the benchmark point. The larger the distance, the lower the IoU score.
- Category is an evaluation metric based on correctly identifying the Ontology category. In the example above correctly identifying an 'Apple' awards 100 points, while a wrong or a missing category awards no points.
Tip
The source Project(s) cannot be changed after being attached to a training Project. Only the benchmark function can be amended. IoU and Category values can be adjusted in the Settings tab after Project creation.
-
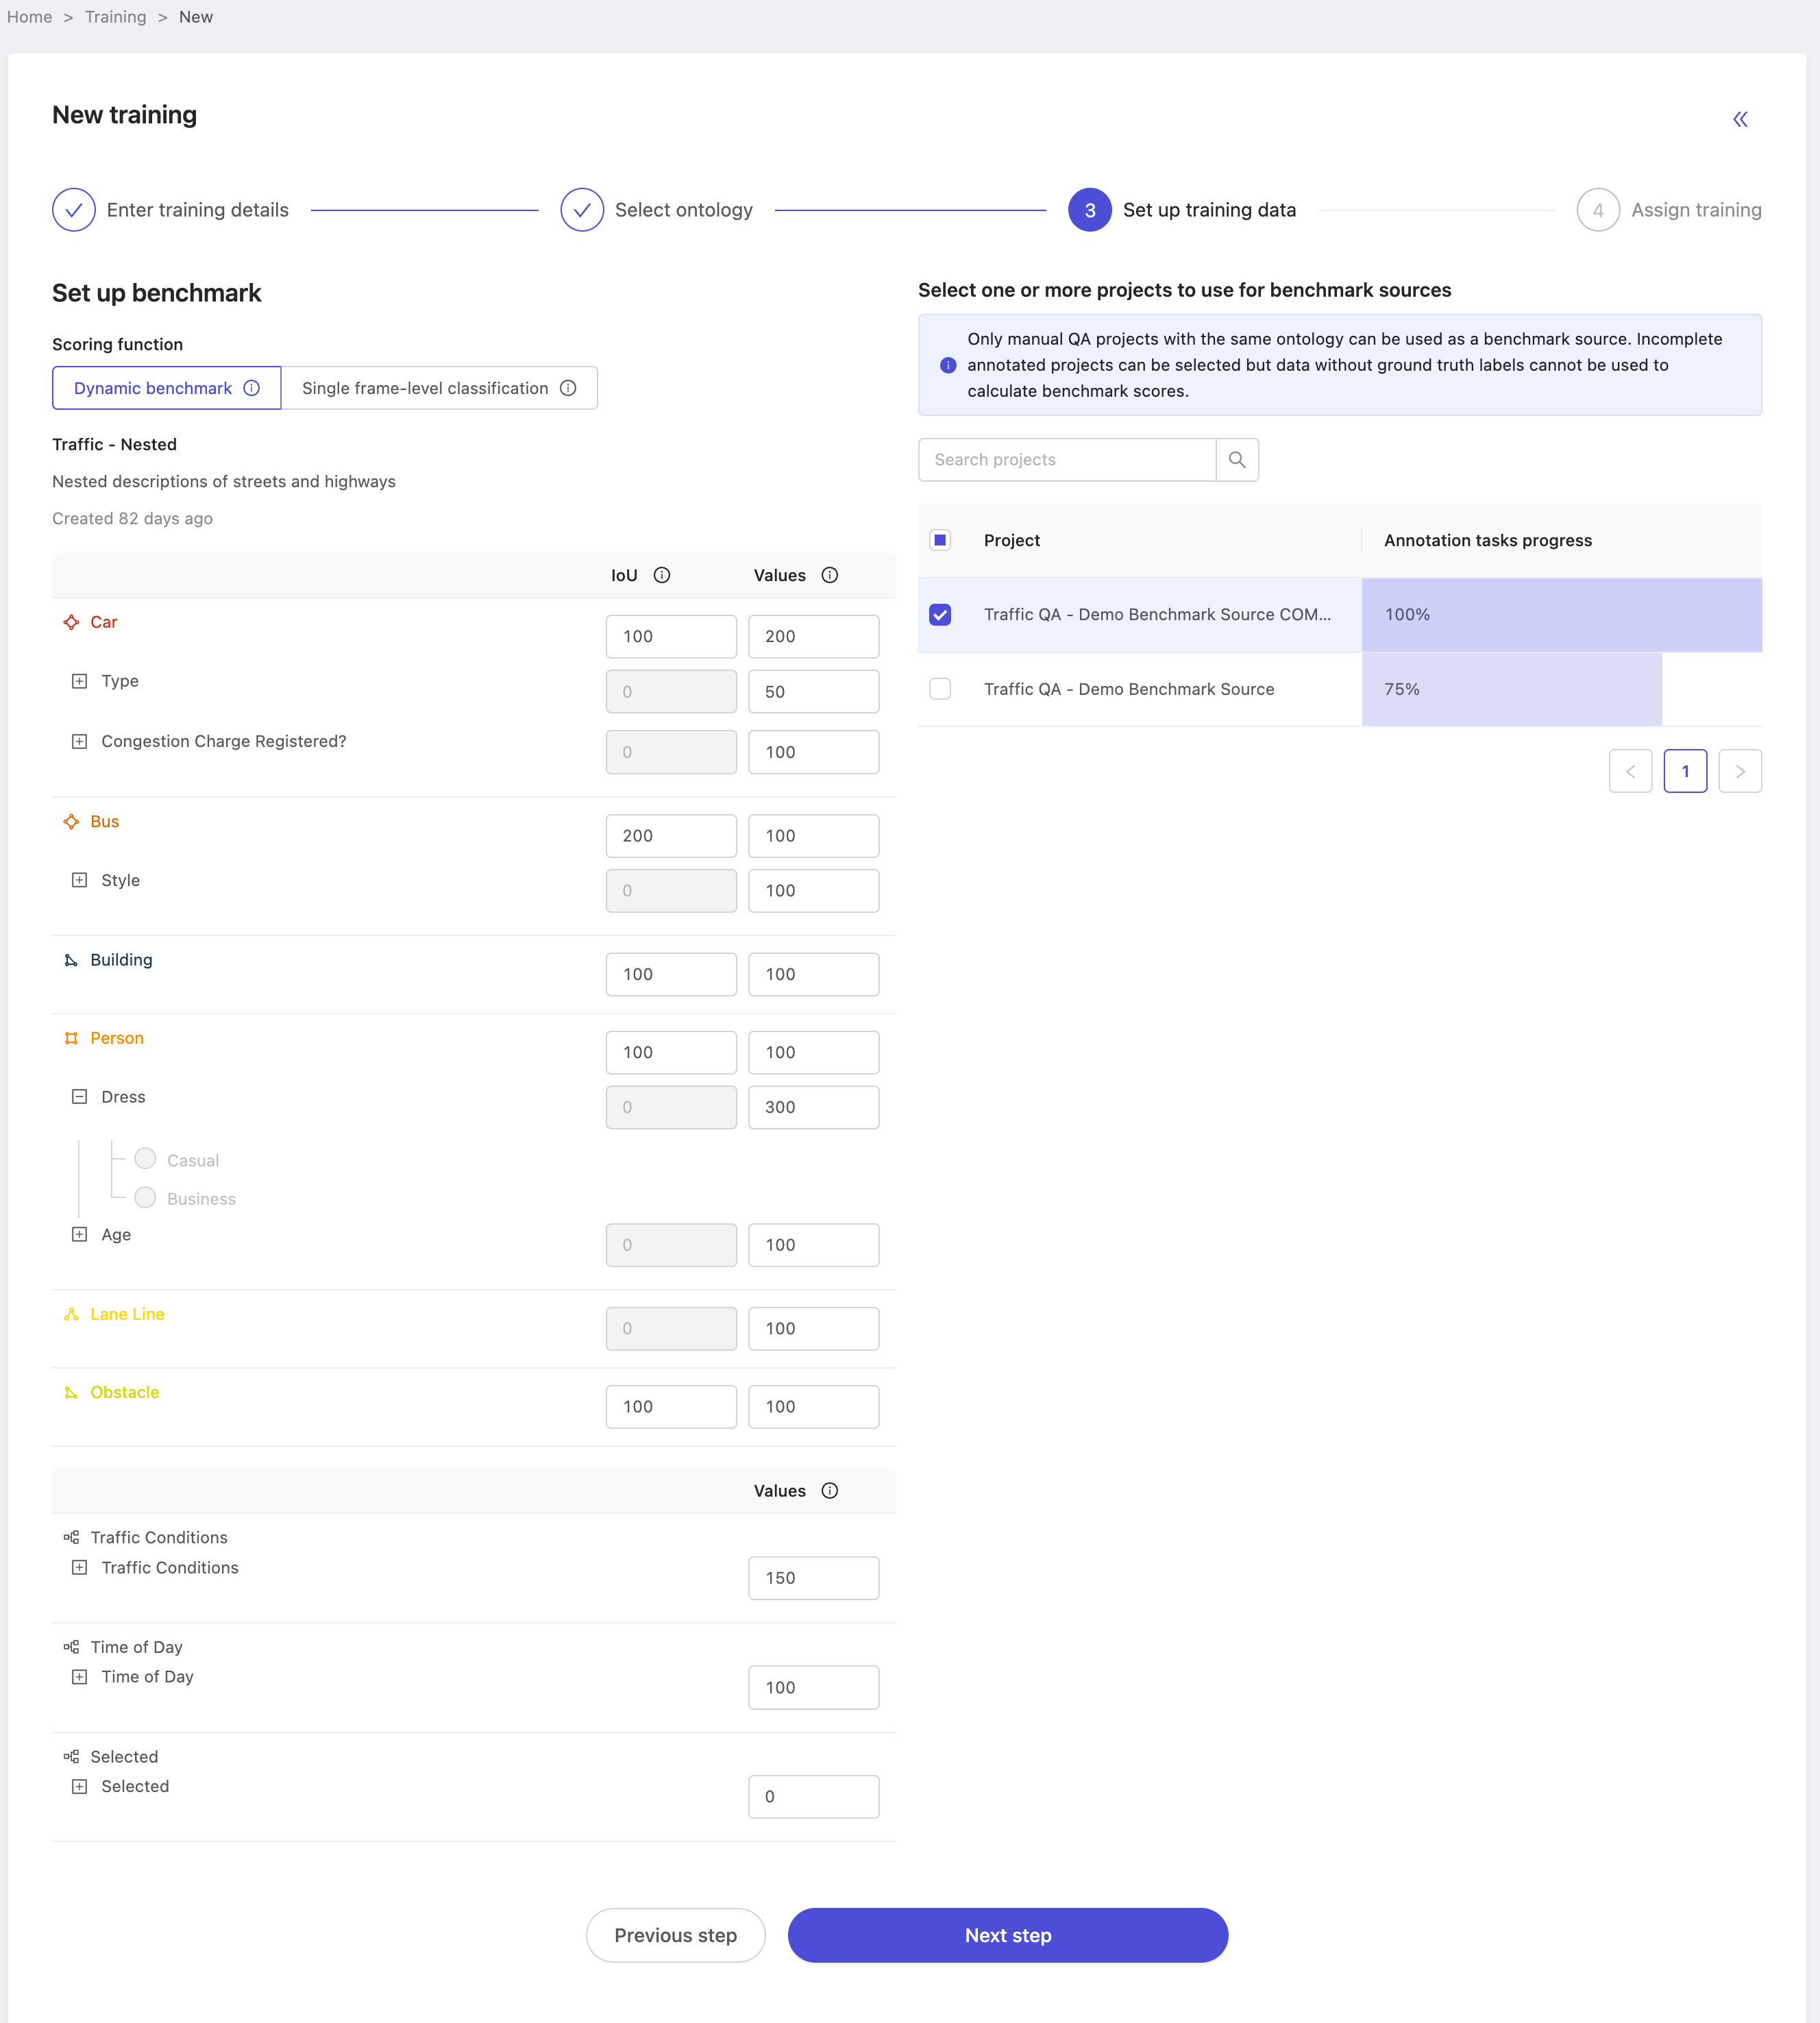
Here, a single source Project with 100% annotation progress is selected, and the benchmark function is customized for several ontology classes. Once you're satisfied with your configuration click Next step to continue.
Note
For more information on how trainees are evaluated, contact [email protected]
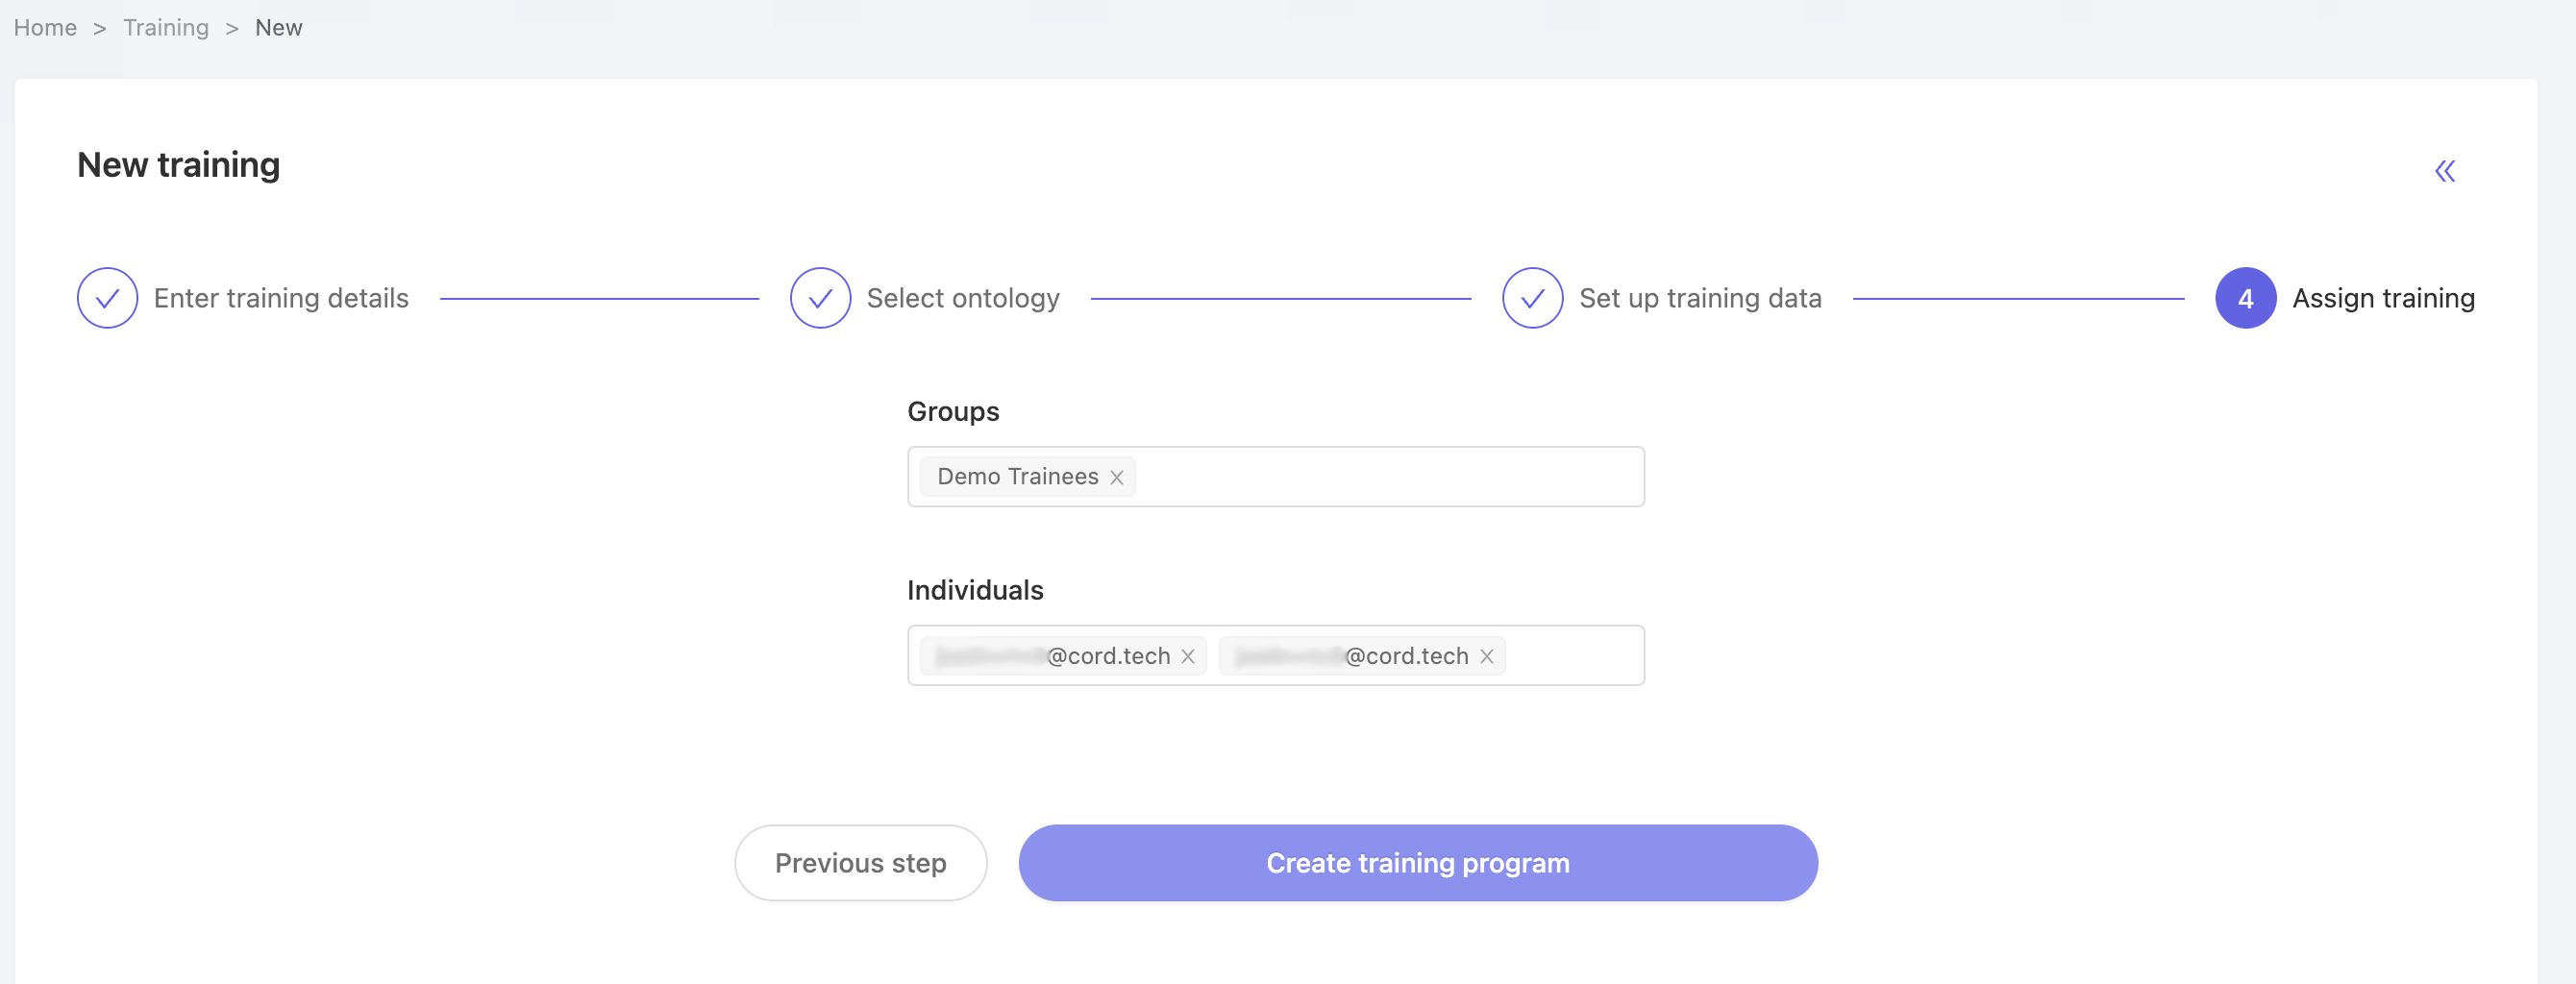
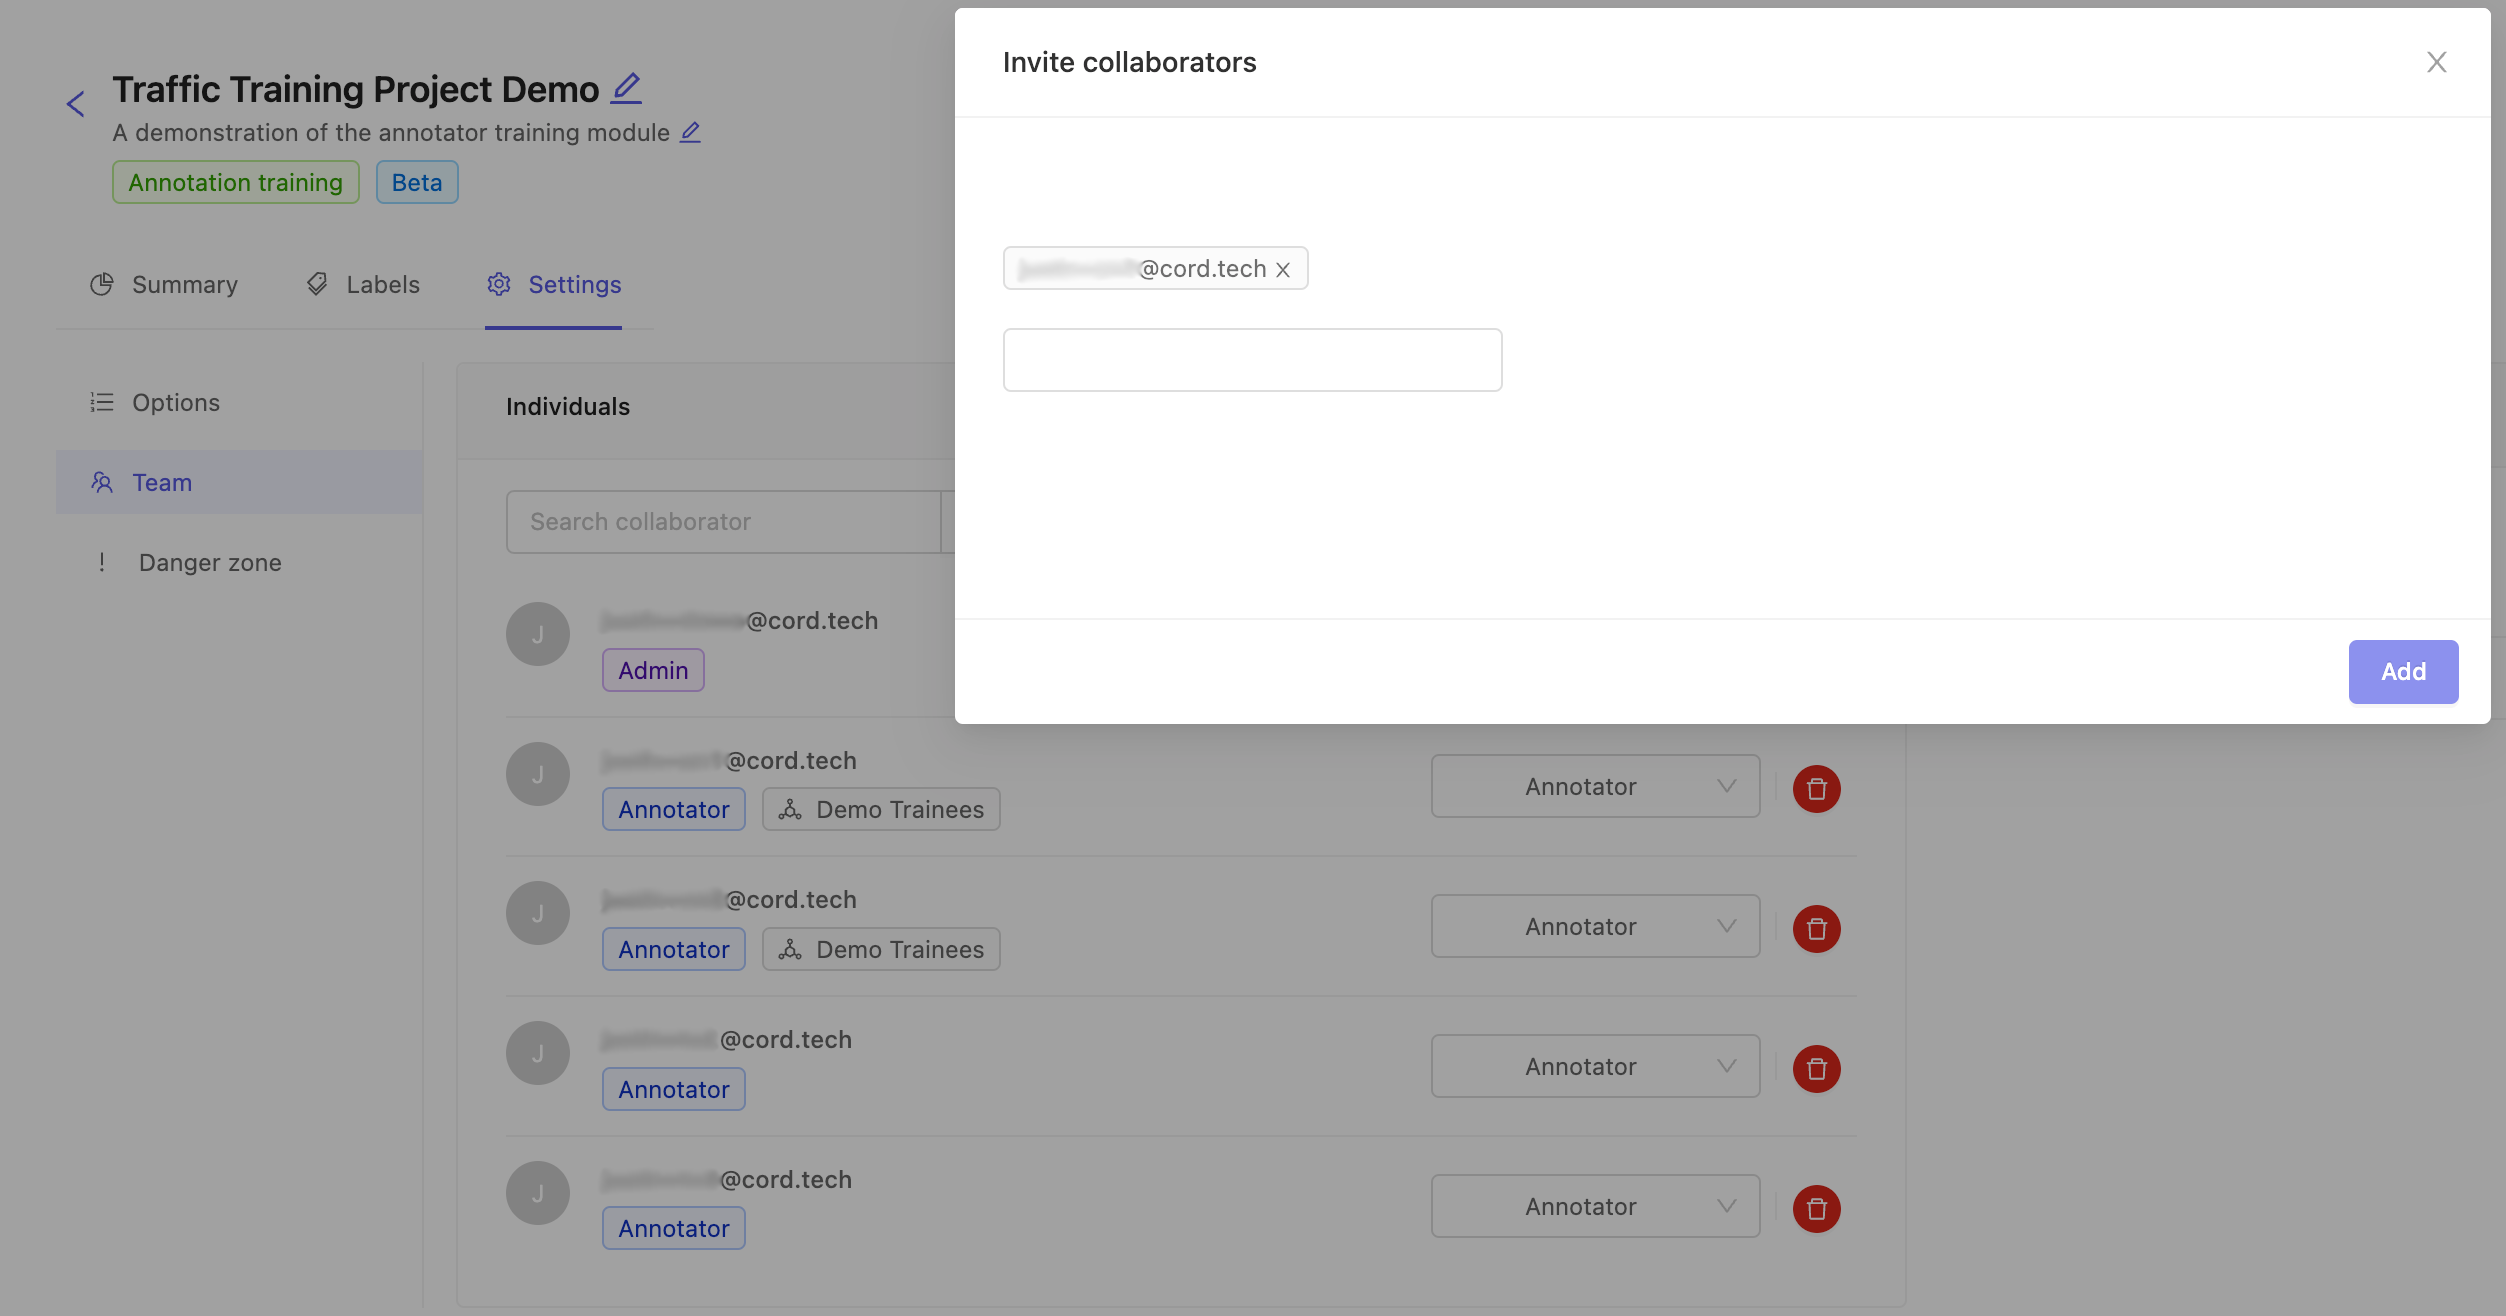
- The final step is to add trainees and create the Project. Add trainees as a group, or as individuals. Click Create training program to create the training Project.
Tip
You can add more annotators to the Project later.
Working with training Projects
This section explains how to run a successful annotator training Project. If you do not yet have a training Project, head over to creating a training Project to get started.
Roles and permissions
| Permission | Admin | Team Manager | Annotator |
|---|---|---|---|
| View benchmark project source | ✅ | ❌ | ❌ |
| Edit benchmark scoring function | ✅ | ❌ | ❌ |
| Add annotation instructions | ✅ | ❌ | ❌ |
| Delete | ✅ | ❌ | ❌ |
| Invite team members | ✅ | ✅ | ❌ |
| Manage team permissions | ✅ | ❌ | ❌ |
| Manage admins | ✅ | ❌ | ❌ |
| Annotate tasks in the task management system | ❌ | ❌ | ✅ |
| Control assignments & status in the task management system | ✅ | ✅ | ❌ |
How to run annotator training
1. Onboard your annotators
You can add annotators during the creation phase, or by going to Settings > Team and inviting new annotators. Remember that unlike in annotation Projects where each piece of data can only be seen by one annotator at a time, training Projects score each annotator against the same set of benchmark tasks. Therefore, a copy of each benchmark task will be added to the Project for each annotator added.
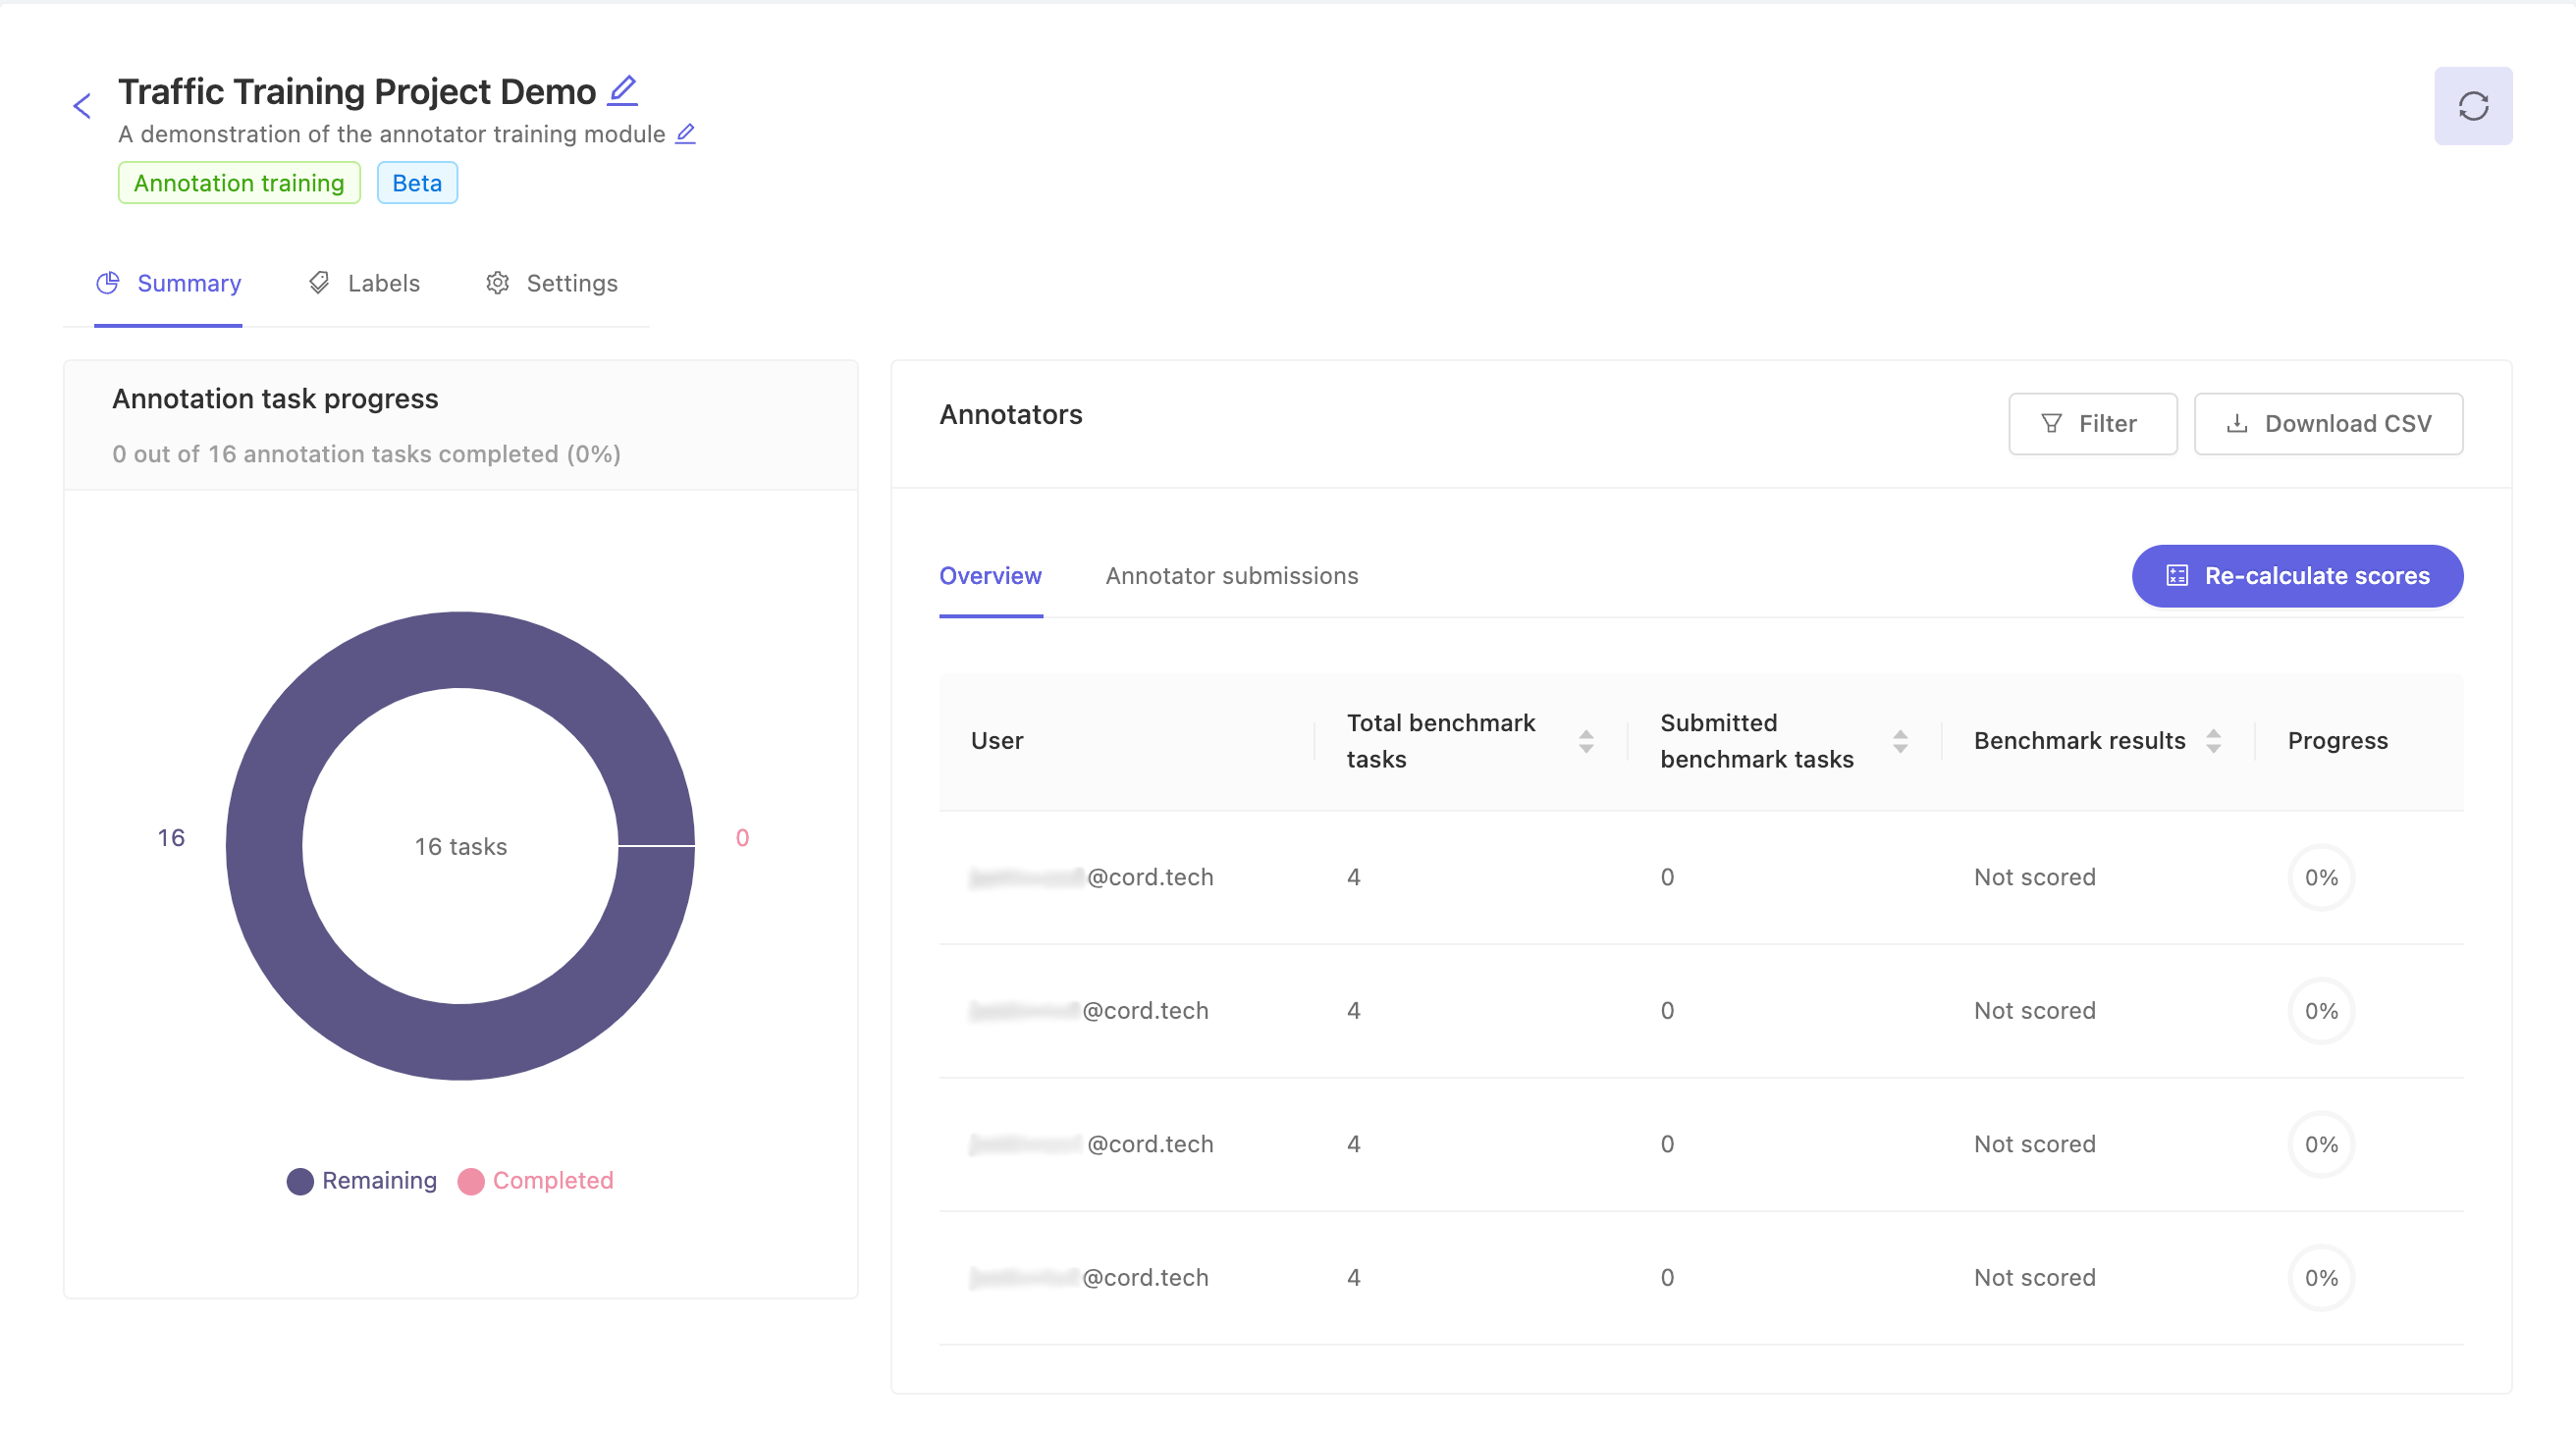
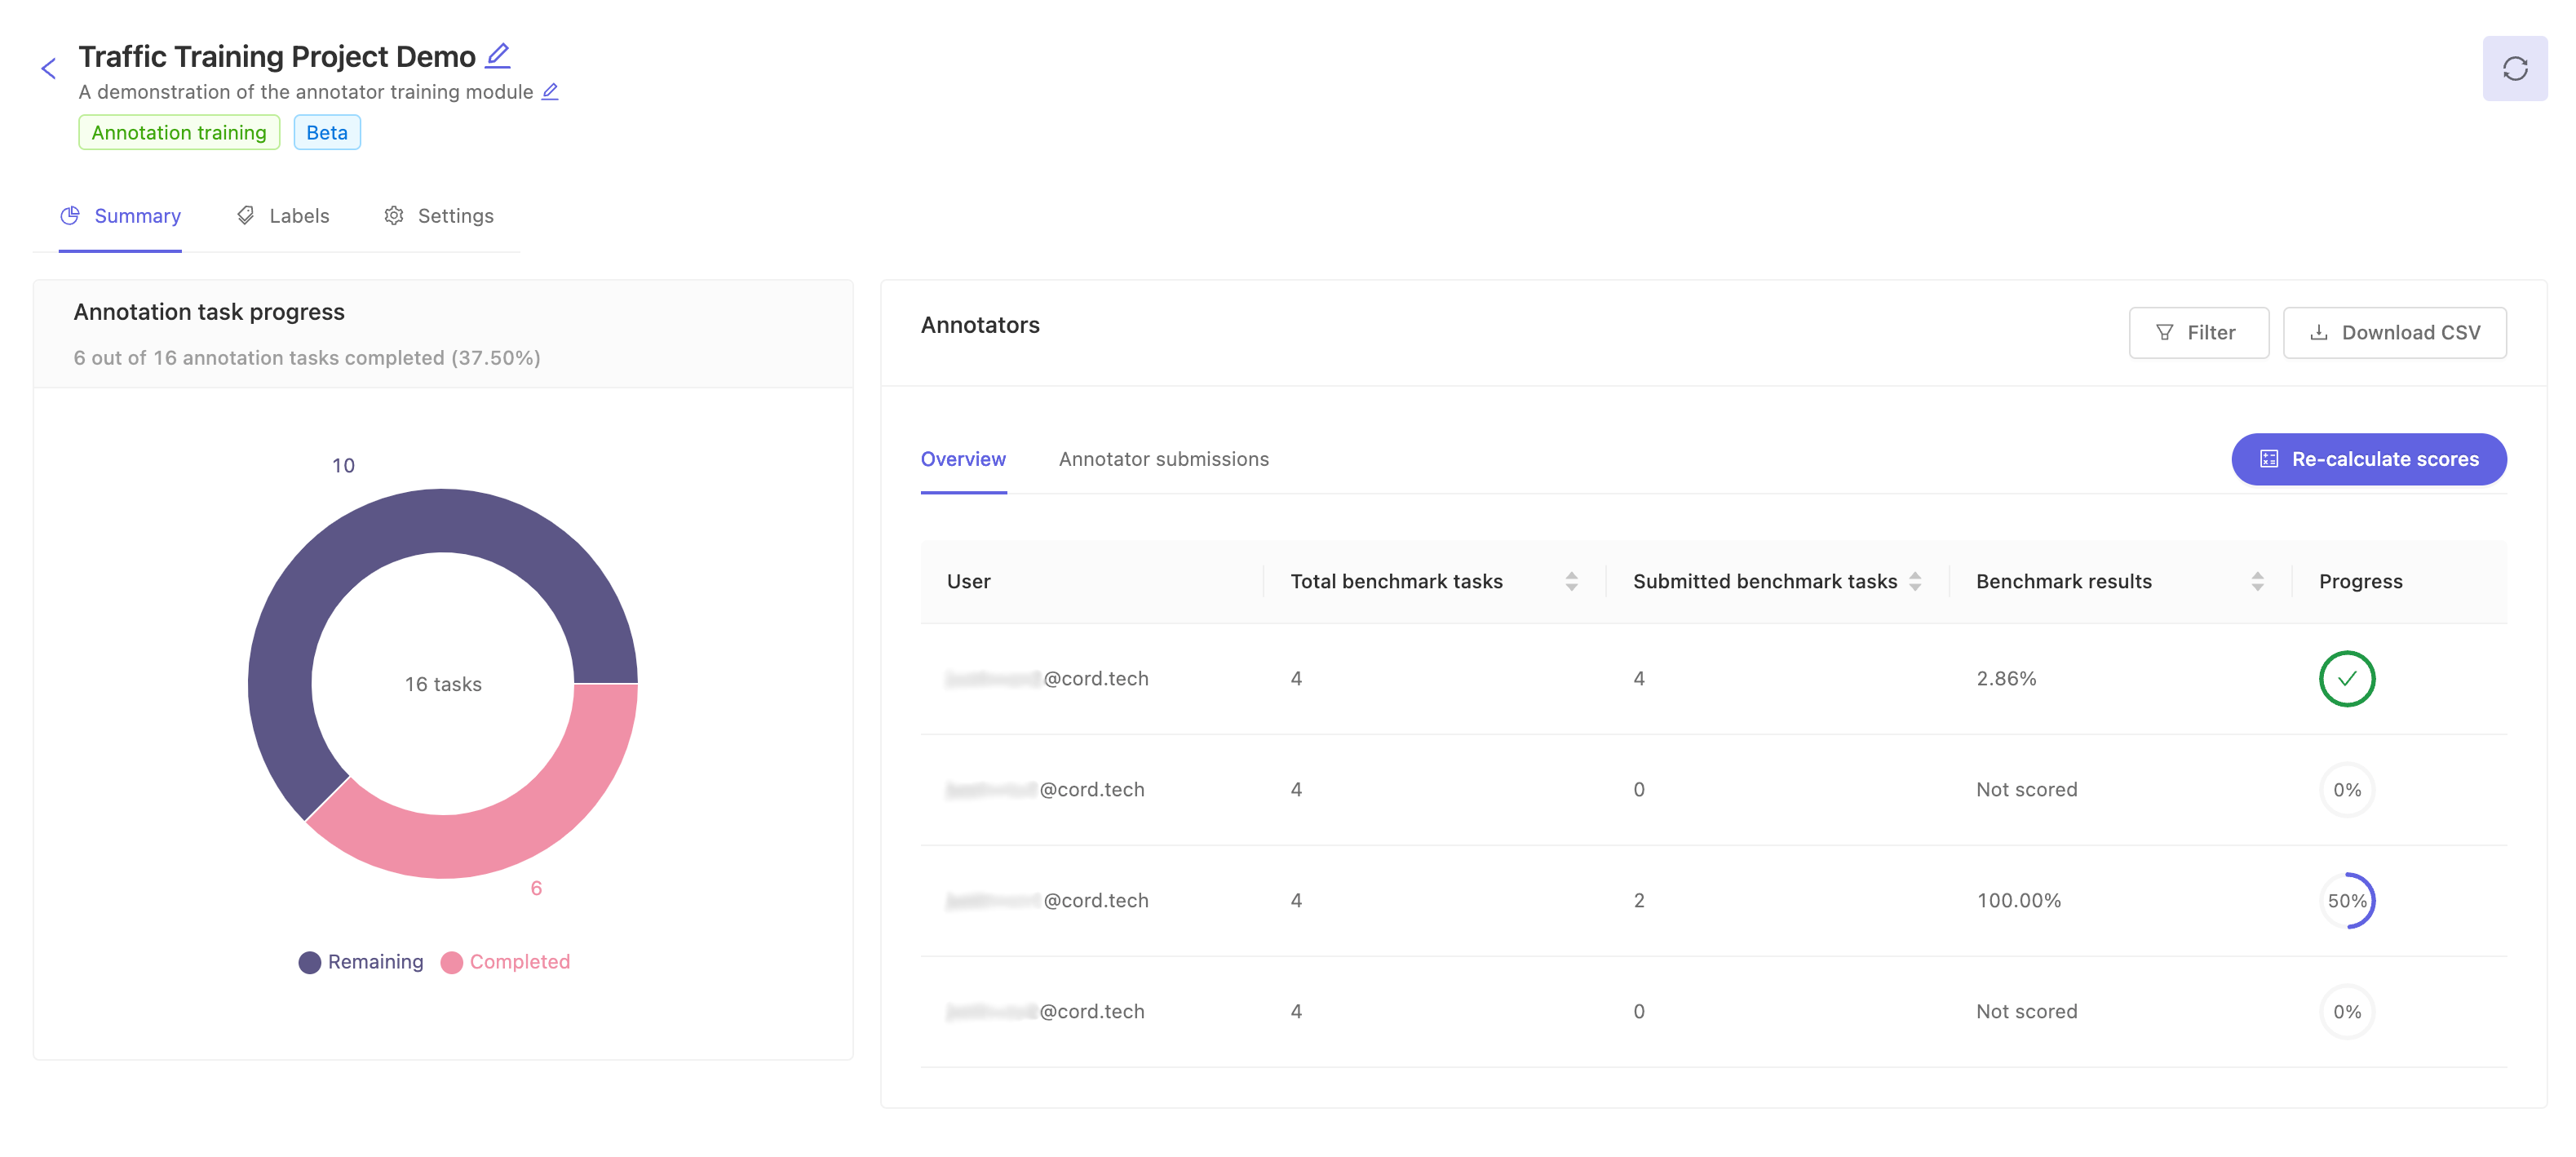
You can confirm annotators and tasks are ready to go by checking the summary screen. In this case, our source Project had 4 tasks and we have 4 annotators assigned. We should expect a total of 16 tasks.
Note
The nature of training Projects is to train annotators. Therefore, tasks are not created for admins assigned to the Project and administrators can not access annotator tasks via the Label > Queue tab. This is to prevent administrators from accidentally completing training tasks meant for annotators. Administrators can still confirm annotator submissions using the Activity and Data tabs in the labels page as needed.
After preparing the Project, share the Project URL with each of your team members so they can join and start the training.
2. Annotators proceed through the benchmark tasks
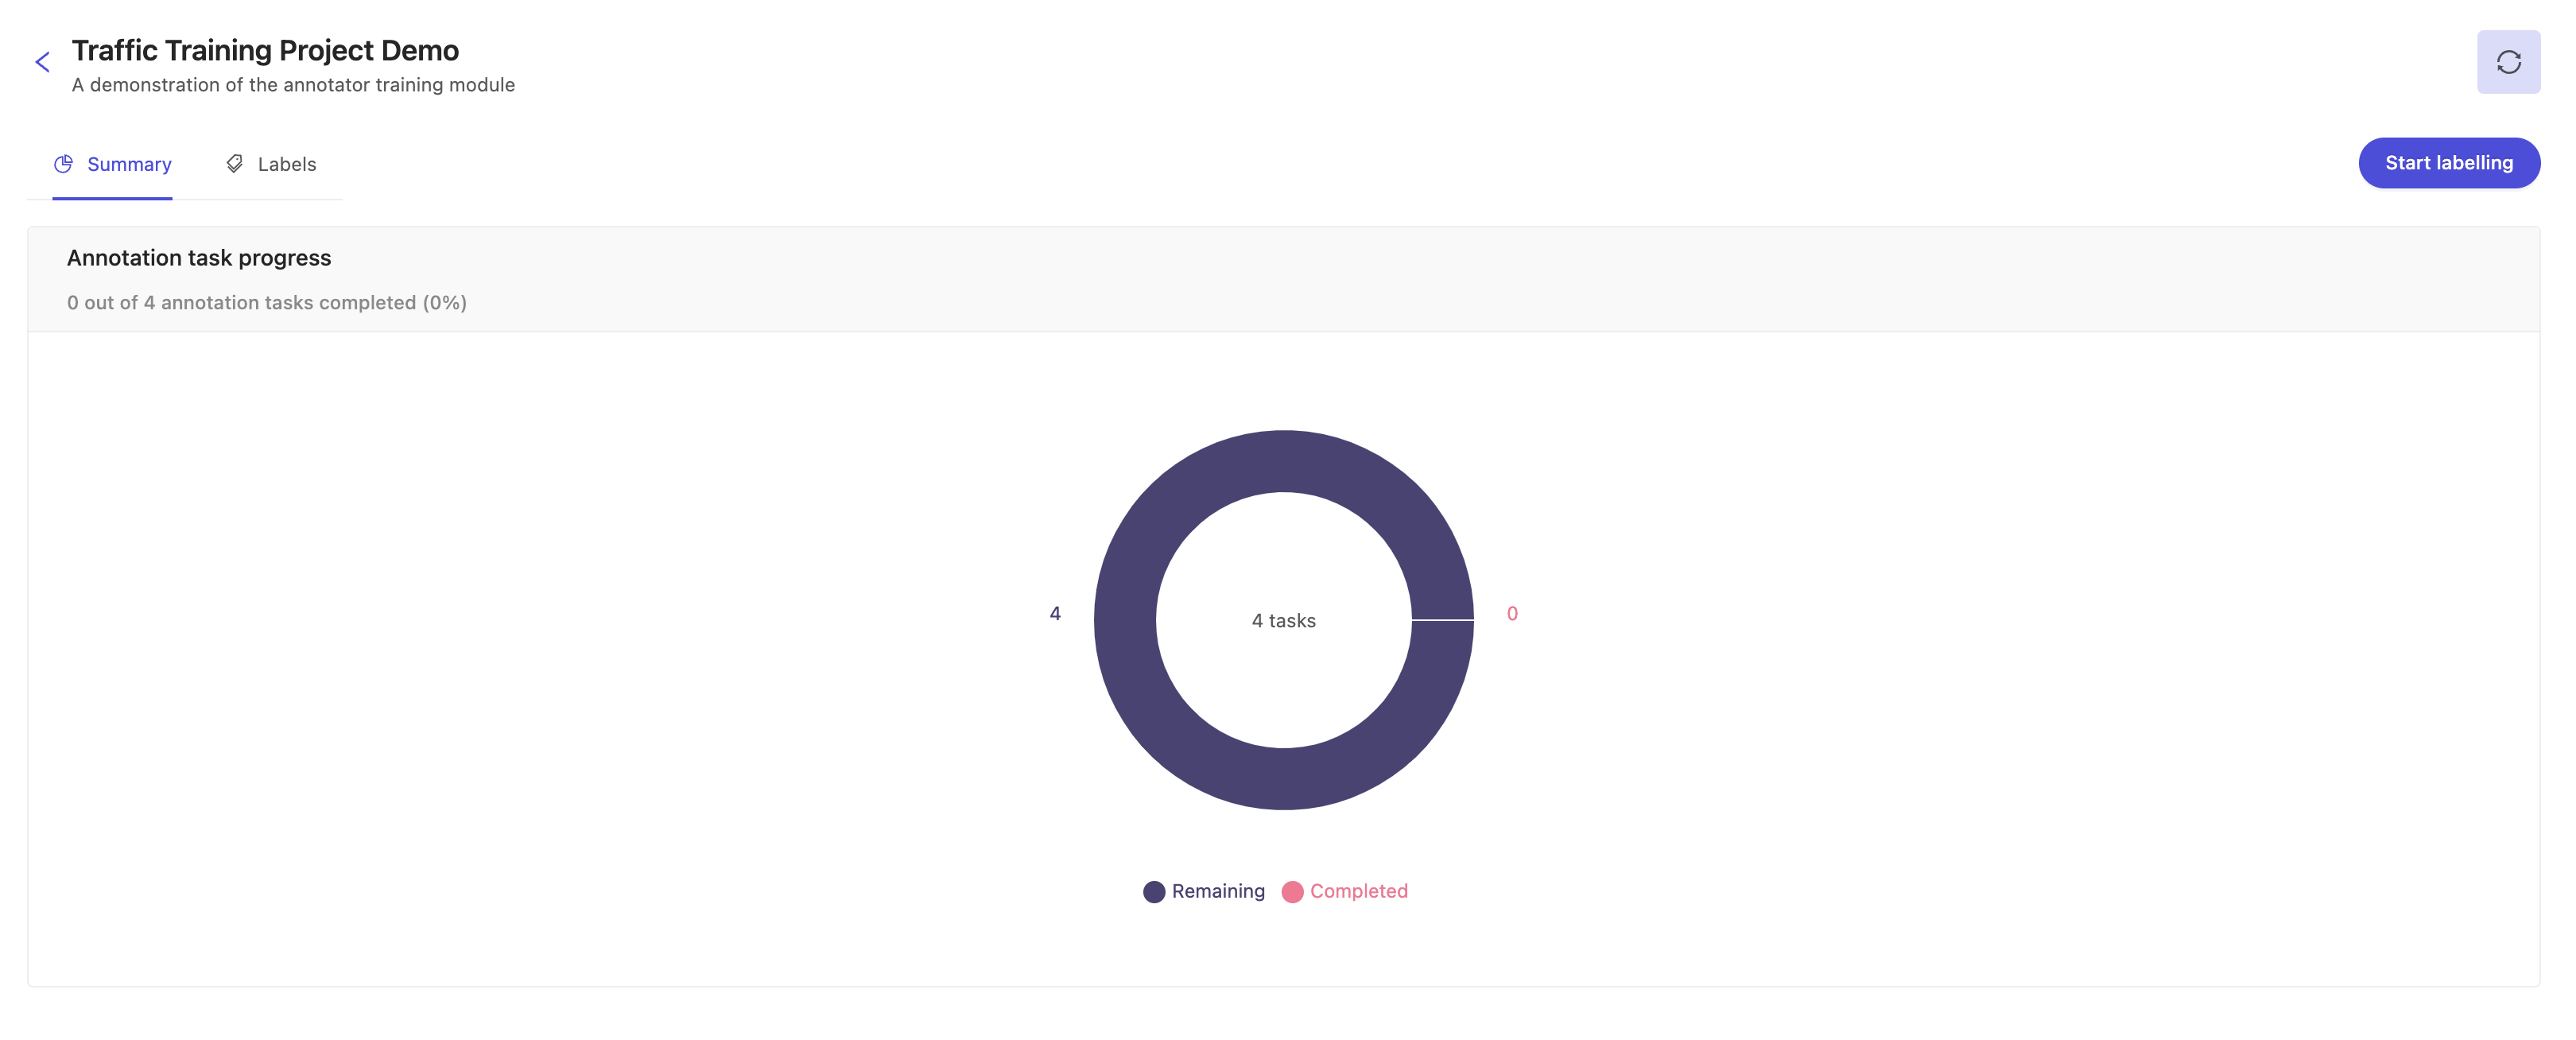
Annotators can access the training Project using the URL you share with them. Annotators see a simplified interface which shows only their tasks in both the summary and labels queue pages. Annotators can start their evaluation tasks by clicking the Start labelling button in the upper right or clicking Initiate next to any given labeling task.

Creating labels in a training Project is identical to creating labels in any other Project. Guide your team to the Label Editor documentation to get them started. Once an annotator submits a task, it can not be re-opened.
3. Evaluate annotator performance
Submitted tasks are automatically run through the benchmark function, and the annotators performance on the task is computed. Project administrators can confirm annotator progress and performance in the Summary page. Use the Overview tab for quick insights into overall annotator performance. Use the Annotator submissions tab to confirm individual task submissions on a per-label basis.
At this stage, you can communicate with your annotators in whichever manner is easiest for you and your team. Use the CSV to download the entire set of results and share with relevant team members. Or perhaps it makes more sense to schedule a live review, using the Annotator submissions' 'View' functionality to verify the benchmark labels and a given annotator's submission in the label editor.
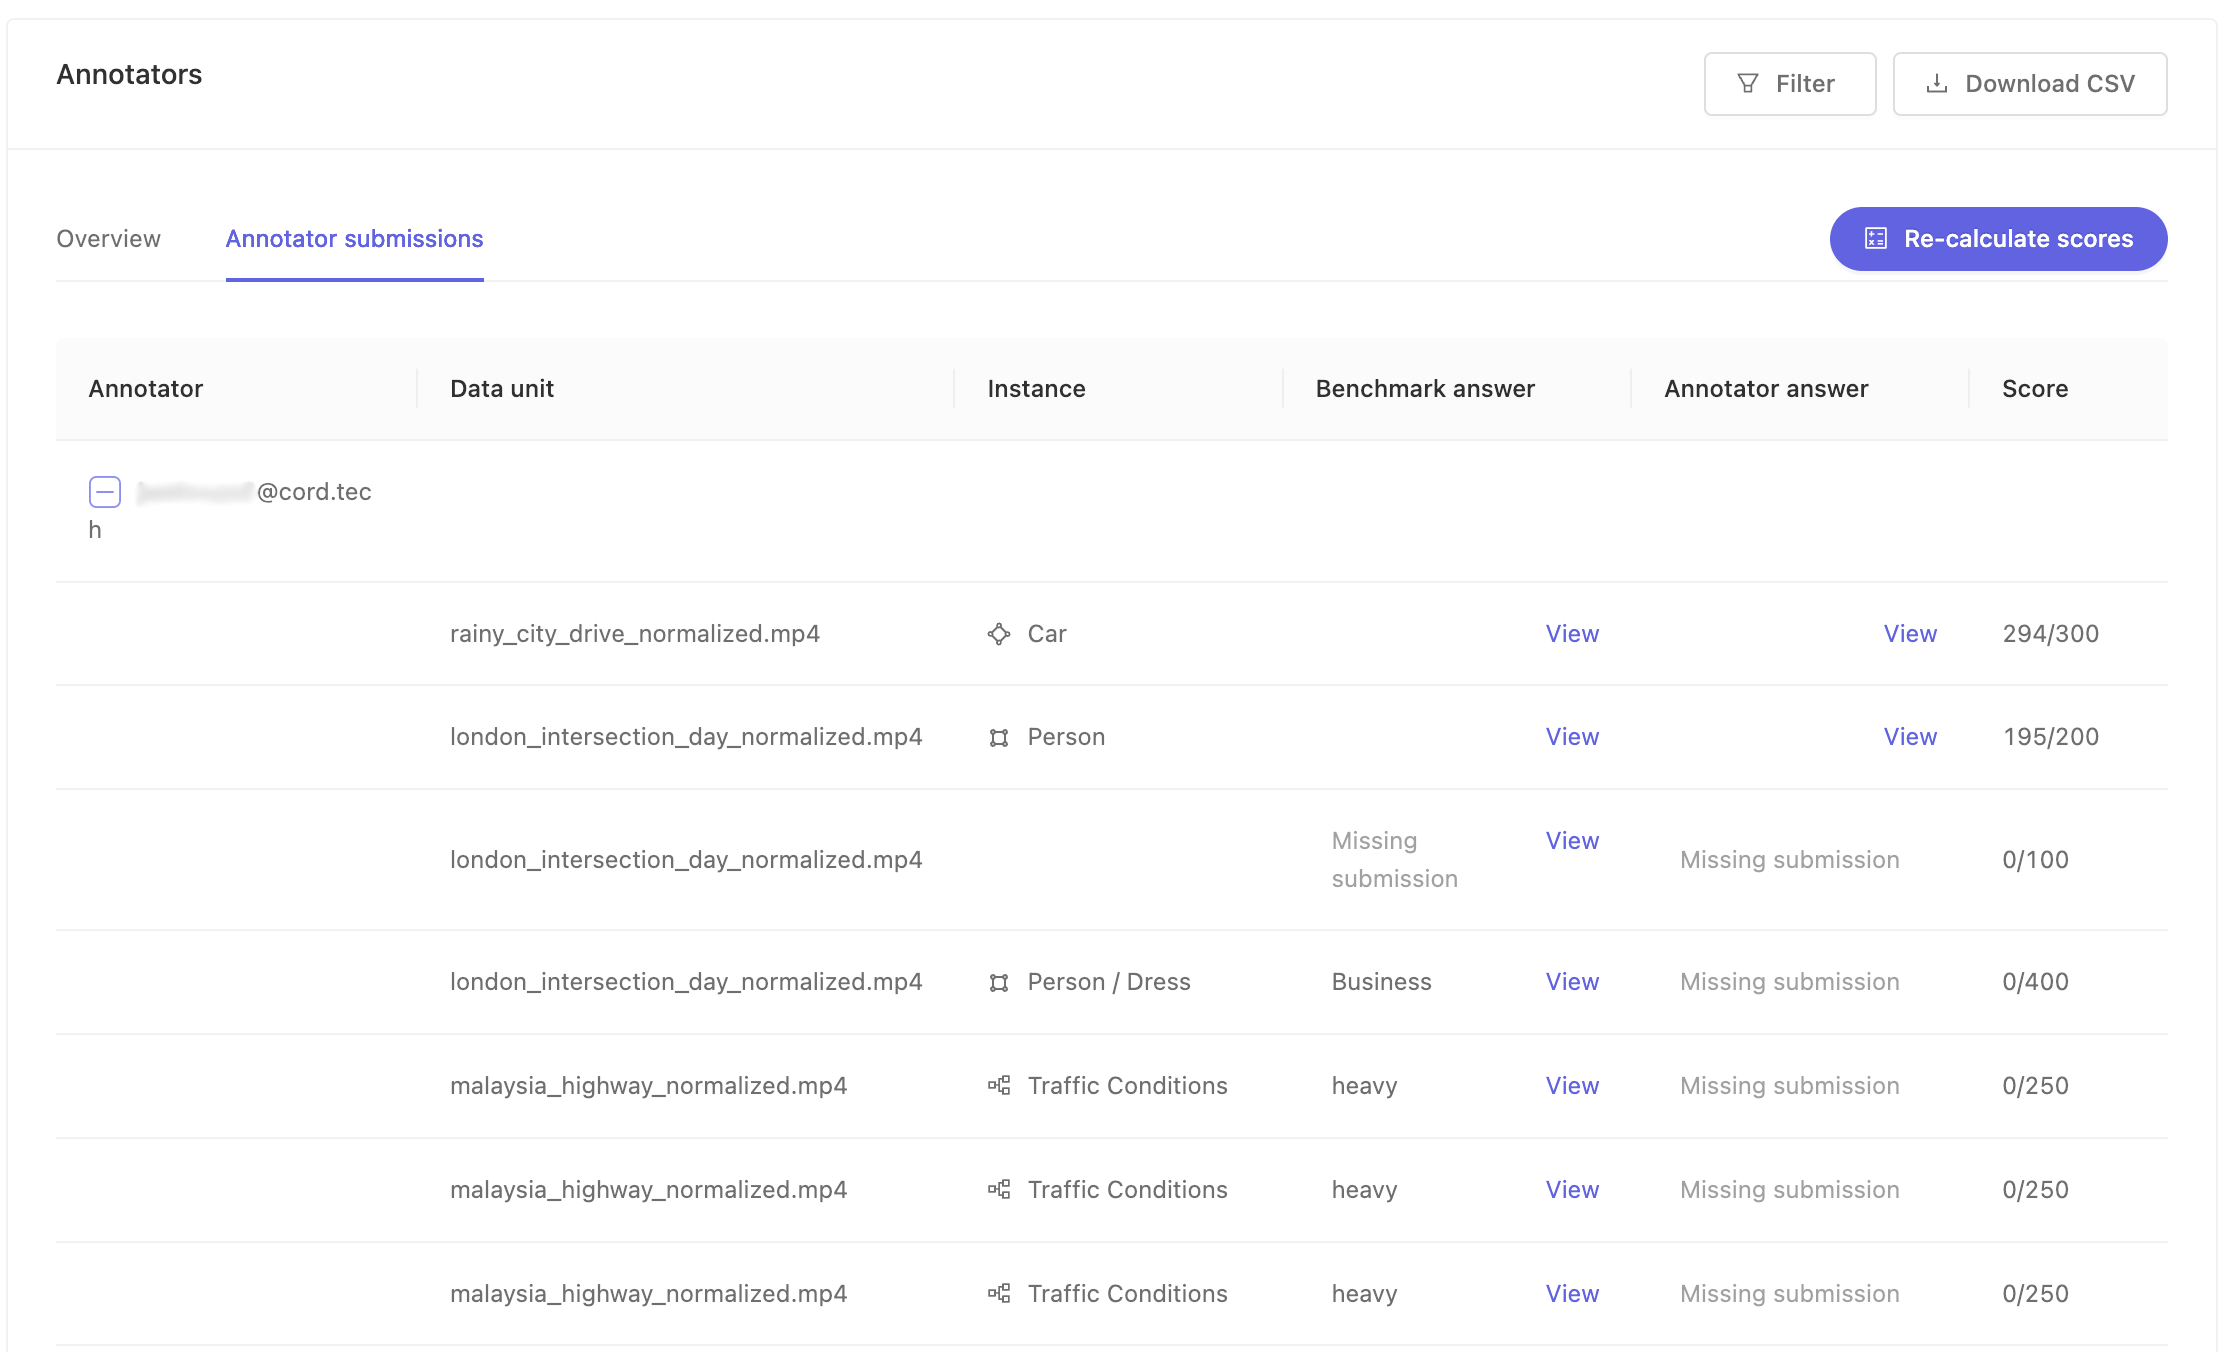
For Projects that have hundreds of evaluation labels per annotator, where an 'evaluation label' is defined as an annotation per frame, we limit the number of evaluation labels displayed in the dashboard for performance reasons. The labels displayed will be some random sampling of the submitted labels. You can always access the full set of evaluation labels by downloading the CSV. Larger downloads may require significant time, and may prompt you to run the downloads in a separate tab so the download can proceed while you can continue working in the current tab.
Note
Some teams may need further insight into the details of the benchmark function in order to devise an accurate system. However, detailed knowledge of the benchmark function may unduly influence trainees behavior. Contact [email protected] for a detailed explanation of how annotators are evaluated.
4. Adjust the benchmark function and re-calculate scores
If you feel that annotator score distributions do not correctly reflect the skill displayed, the benchmark function can be adjusted and annotator scores can be recalculated.
Go the Settings page, and find the section marked 'Benchmark scoring function'. Press the Edit button to enable the function's weight editor and change the values to match your new plan. Finally, press Save in the upper right to persist the new function configuration.
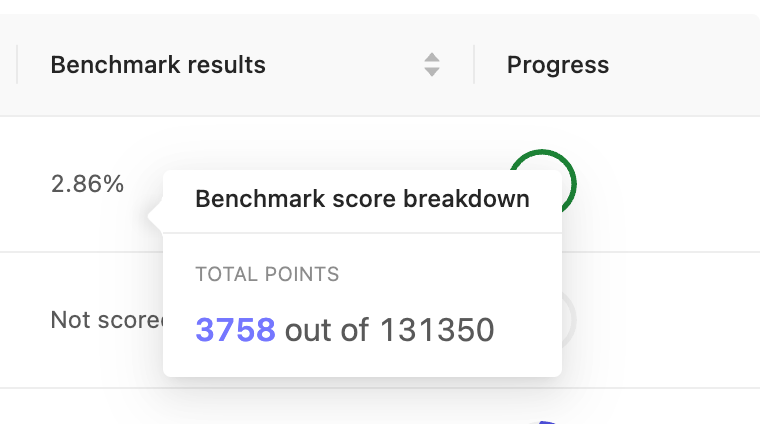
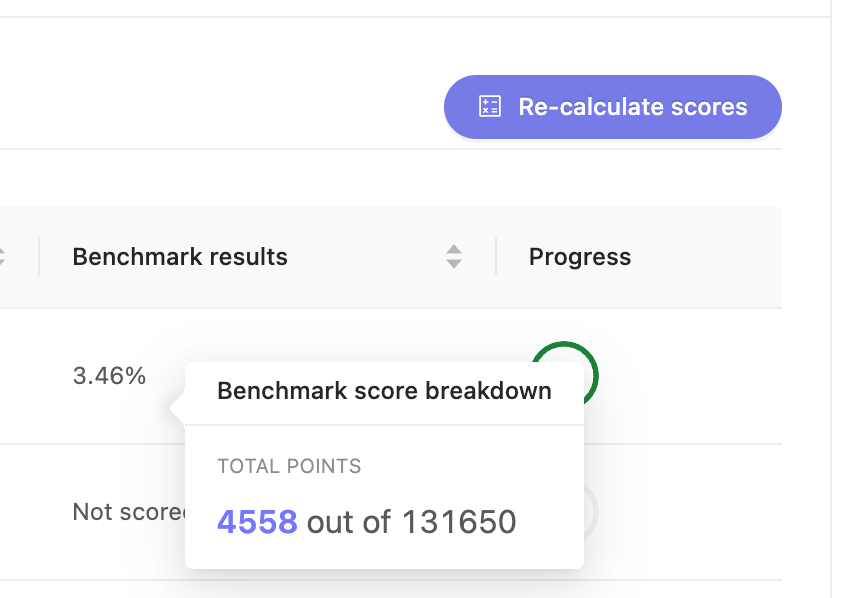
To see the changes applied against previous submissions, return to the 'Summary' page and press the Re-calculate scores button. If a given annotator's annotations were affected by the weighting change, the 'Benchmark results' column will change to reflect their new score with the new weights! In this case, we see the score of an annotator, on the left and right respectively before and after we changed the scoring function (as above), and pressed the Re-calculate scores button. The annotator's change in score is noticeable, but doesn't seem to change his performance from unskilled to skilled. Likely, this annotator should undergo another round of training.
5. Repeat until finished
You can continue to adjust scores even after all the annotators have finished all their tasks, until you feel the score distribution matches your intent.
You can also add new annotators to existing Projects, as you did in step #1.
Tip
When adding a new group of users, or a large number of new annotators, we recommend creating a new training Project. This way you can manage the new cohort of annotators all at once.
Updated about 2 months ago