Remove duplicate images
The presence of duplicate or closely similar images can introduce bias in deep learning models. Encord Active provides the capability to identify and eliminate duplicate or near-duplicate images from datasets. This process contributes to enhancing data quality by removing redundant instances, ultimately leading to improved model performance.
In this workflow, the Uniqueness quality metric is used to identify duplicate and near-duplicate images.
Uniqueness metric
The Uniqueness metric evaluates all images within the dataset and assigns a uniqueness score to each, indicating their distinctiveness.
-
The uniqueness score falls within the [0,1] range. A higher score indicates a greater level of image uniqueness. The Duplicates summary on the Data > Overview tab uses a range between 0 and 0.0001.
-
A score of zero signifies the presence of at least one identical image within the dataset. For instances with N duplicate images, N-1 of them are assigned a score of zero (with only one holding a non-zero score) to facilitate their exclusion from the dataset.
-
Near-duplicate images are labeled as
Near-duplicate imageand are presented side by side in the Explorer's grid view. This setup simplifies the decision-making process when selecting which image to keep and which one to remove.
Quick Tour
All the sections in the Quick Tour assume that you are already in a Project.
Tip
Choose any image in the Explorer workspace and click its Similar items !Similarity button button. This displays images similar to the selected one, including any duplicates if they exist.
Explorer
The Explorer page has three areas that can help you find duplicate images in your Project.
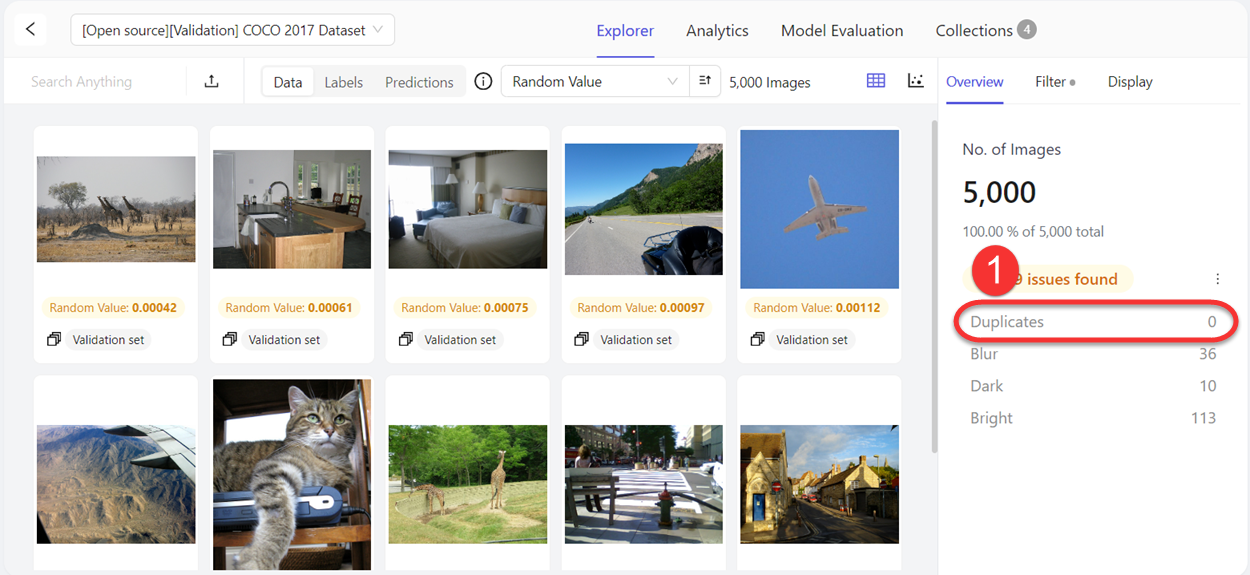
1: Duplicates Shortcut
Found in the Overview tab, any images that have a Uniqueness value of 0 to 0.0001 are highlighted as duplicates. You can adjust this value from the Filter tab.
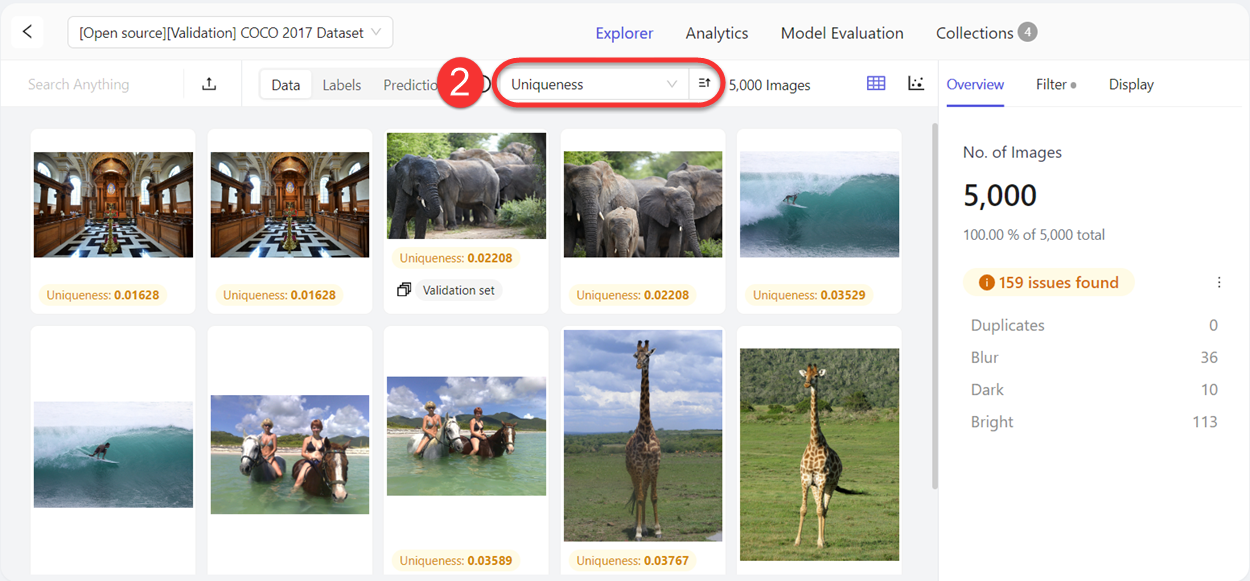
2: Sorting by `Uniqueness`
The entire Project can be sorted by Uniqueness. Sort by ascending order to display duplicates first.
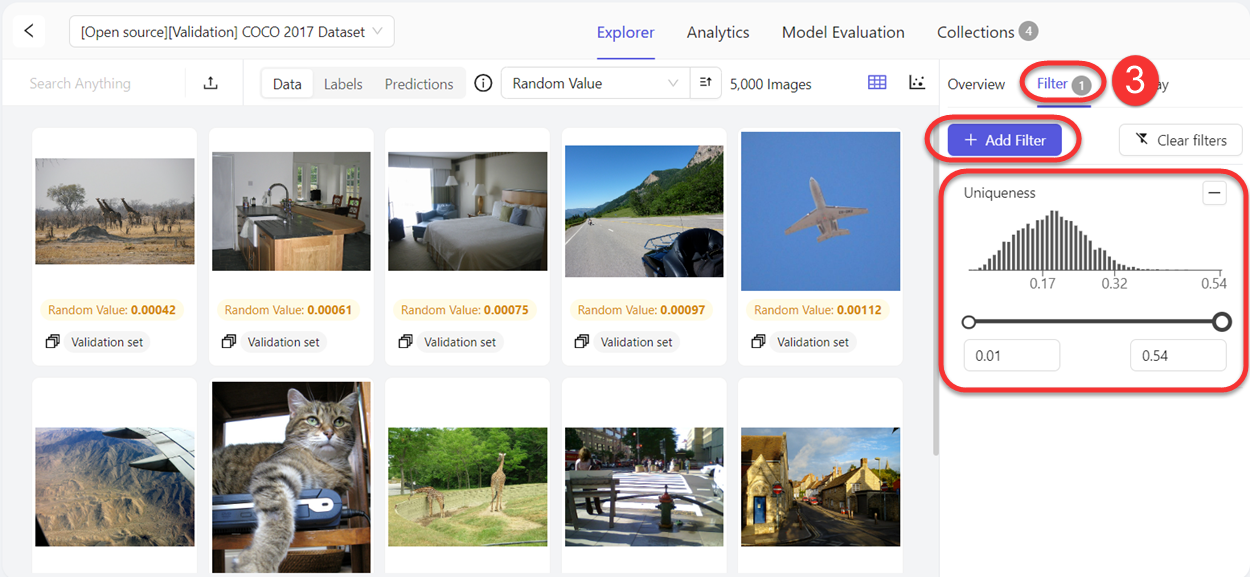
3: Filtering by `Uniqueness`
Filter the entire project using Uniqueness.
Go to Filter tab > Add Filter > Data Quality Metrics > Uniqueness A small histogram diagram appears above the filter.
You can then change the filter settings to specify a range closer to 0.
Analytics
In a Project, go to the Analytics page and pick the Uniqueness quality metric for the Metric Distribution section.

The chart displays the distribution of data based on the Uniqueness scores.
Remove duplicate images
When you want to remove/exclude duplicate images from a dataset, tag duplicate images and create a Collection devoid of duplicates.
To remove duplicate images from your Project:
-
Log in to the Encord platform.
The landing page for the Encord platform appears. -
Click Active in the main menu.
The landing page for Active appears. -
Click the Project.
The landing page for the Project appears with the Explorer tab selected with Data selected. -
Click the Duplicates shortcut under the Overview tab.
The Duplicates shortcut applies theUniquenessfilter to all images in the Project. TheUniquenessfilter returns images with aUniquenessvalue between 0 and 0.0001. -
Sort the filtered data in ascending order by
Uniqueness. -
Adjust the
Uniquenessfilter from the default value to find all the duplicate images in the Project.
As you adjust the filter the images that appear in the Explorer workspace change. -
Select one and then all images.
-
Click the Add to a Collection button to create a Collection.
-
Click New Collection.
-
Name the Collection
Duplicates.
All selected images have the tagDuplicatesapplied to them. -
Reset all Filters.
-
Add a Collections filter that excludes
Duplicates. -
Select one and then all images.
-
Click the Add to a Collection button to create a Collection.
-
Click New Collection.
-
Specify a meaningful name for the Collection.
-
Go to the Collections page.
-
Select the Collection that excludes
Duplicates. -
Click Create Dataset.
-
Specify a meaningful name and description for the Dataset and Project.
-
Click Submit.
The Dataset and Project appear in Annotate.
Incorporating this workflow into dataset management strategies can significantly enhance data quality, eliminate redundancies, and contribute to more accurate model training and evaluation.
Remove near-duplicate images
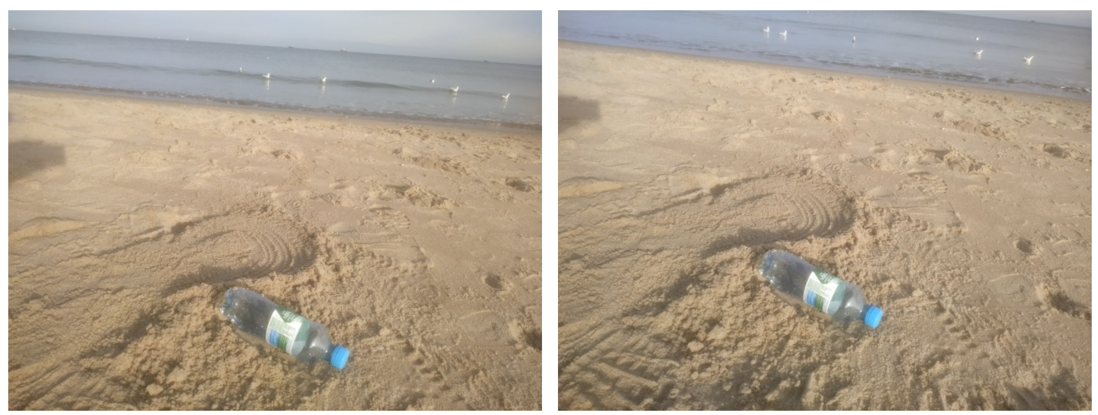
An example of near-duplicate image pairs detected with Encord Active
Similar to duplicates, near-duplicate images are images where one image slightly differs from another due to shifts, blurriness, or distortion. Consequently, they should also be eliminated from the dataset. However, in this scenario, a decision is required to determine which sample remains and which is discarded. These images possess scores marginally greater than 0 and are displayed alongside one another in the Explorer grid view workspace, facilitating easy comparison.
-
Log in to the Encord platform.
The landing page for the Encord platform appears. -
Click Active in the main menu.
The landing page for Active appears. -
Click the Project.
The landing page for the Project appears with the Explorer tab selected with Data selected. -
Click the Duplicates shortcut under the Overview tab.
The Duplicates shortcut applies theUniquenessfilter to all images in the Project. TheUniquenessfilter returns images with aUniquenessvalue between 0 and 0.0001. -
Sort the filtered data in ascending order by
Uniqueness. -
Adjust the
Uniquenessfilter from the default value to 0 to 0.05. -
Examine the images in the Explorer workspace and select the images you want removed from the Project.
-
Click the Add to a Collection button to create a Collection.
-
Click New Collection.
Note
If you already have a Collection called
Duplicates, add the images to the existing Collection and go to step 11. -
Name the Collection
Duplicates.
All selected images have the tagDuplicatesapplied to them. -
Reset all Filters.
-
Add a Collections filter that excludes
Duplicates. -
Select one and then all images.
-
Click the Add to a Collection button to create a Collection.
-
Click New Collection.
-
Specify a meaningful name for the Collection.
-
Go to the Collections page.
-
Select the Collection that excludes
Duplicates. -
Click Create Dataset.
-
Specify a meaningful name and description for the Dataset and Project.
-
Click Submit.
The Dataset and Project appear in Annotate.
With these actions, users can efficiently manage near-duplicate images and improve dataset quality.
Updated about 2 months ago